🧢 Beautiful ✨ Detailed πŸ’ Adorable

Crocheted Bumblebee Keyring Amigurumi Pattern

Crocheted Bumblebee Keyring Amigurumi Pattern
4.7β˜… Rating
2-3 Hours Time Needed
3.2K Made This
βœ‚οΈ

Beginner Friendly Level

Perfect for those just starting their sewing journey, with clear instructions and simple techniques

⏱️

Bite-Sized Project

Complete in under 2 hoursβ€”quick, fun, and perfect for a little creative escape.

🐝

Pocket Pal

A mini friend to carry anywhere, providing comfort and companionship in a perfectly portable size.

About This Crocheted Bumblebee Keyring Amigurumi Pattern

Crocheted Bumblebee Keyring Amigurumi Pattern crochet pattern - detailed view of completed project

With clear round-by-round instructions and straightforward color changes, you'll find this project enjoyable from start to finish. The finished bee is small enough to take on the go but detailed enough to showcase your growing crochet skills.

Why You'll Love This Crocheted Bumblebee Keyring Amigurumi Pattern

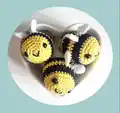
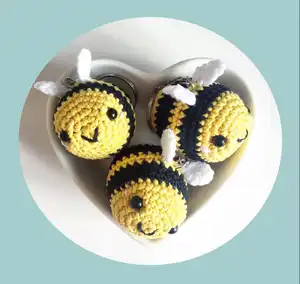
I absolutely love this bumblebee pattern because it's one of those projects that brings instant joy without requiring a huge time commitment. The color changes between yellow and black create those iconic bee stripes that are so recognizable and cheerful. I appreciate how the pattern includes those sweet little details like the pink cheeks and V-shaped smile that give the bee so much character. The addition of wings and a hanging loop makes it practical too, so it's not just cute but functional as a keyring or bag charm. Plus, the option to add dried lavender inside is such a lovely touch that turns this into a multi-sensory gift.

Crocheted Bumblebee Keyring Amigurumi Pattern step 1 - construction progress Crocheted Bumblebee Keyring Amigurumi Pattern step 2 - assembly progress Crocheted Bumblebee Keyring Amigurumi Pattern step 3 - details and accessories Crocheted Bumblebee Keyring Amigurumi Pattern step 4 - final assembly and finishing

Switch Things Up

I love experimenting with this bumblebee pattern by changing up the colors to create different bee varieties or even transforming it into other insects entirely. You could swap the yellow for white and the black for red to make a adorable ladybug keyring instead. Or try using pastel colors like mint green and soft pink for a whimsical fantasy bee that doesn't exist in nature but looks absolutely charming.

Another fun variation I enjoy is adjusting the wing size and shape – try making them larger and more prominent, or even adding a second layer of wings in a slightly darker shade for dimension. You could also embroider different facial expressions to give each bee its own personality, from sleepy eyes to surprised looks.

For a more textured approach, I sometimes use fuzzy yarn for the yellow stripes to give the bee a soft, fluffy appearance that's extra cuddly. The chain length can also be customized – make it shorter for a zipper pull or longer for a bag charm. Adding small embroidered details like tiny flowers or hearts on the wings can make each bee truly unique and personal.

Common Mistakes & How to Fix Them

βœ— Forgetting to place safety eyes before stuffing completely can make it difficult to secure them properly through dense filling βœ— Not leaving long enough tails when fastening off wings and chain makes assembly frustrating and weak at attachment points βœ— Inconsistent tension during color changes creates lumpy stripes instead of smooth transitions between yellow and black sections βœ— Placing wings too close together or too far apart disrupts the bee's proportions and makes it look unbalanced overall

Crocheted Bumblebee Keyring Amigurumi Pattern

Create this adorable crocheted bumblebee keyring that's perfect for adding a touch of handmade charm to your everyday accessories. This delightful pattern features cheerful yellow and black stripes, sweet embroidered details, and delicate wings that bring this little bee to life. Complete with a hanging loop, this mini amigurumi makes a wonderful gift or personal keepsake that can brighten up bags, keys, or backpacks with its sunny personality.

Beginner Friendly 2-3 Hours

Materials Needed for Crocheted Bumblebee Keyring Amigurumi Pattern

β€” Main Fabric

  • 01
    Crochet yarn Natura Just Cotton in Colour A: Tournesol (yellow)
  • 02
    Crochet yarn Natura Just Cotton in Colour B: Noir (black)
  • 03
    Crochet yarn Natura Just Cotton in Colour C: Ibiza (light blue for wings)
  • 04
    Crochet yarn Natura Just Cotton in Colour D: Rose Layette (pink for cheeks)

β€” Tools Required

  • 01
    Crochet hook 2.5mm
  • 02
    Yarn needle
  • 03
    Scissors
  • 04
    6mm black safety eyes
  • 05
    Stuffing material
  • 06
    Optional: dried lavender for scented filling

Progress Tracker

0% Complete

β€” Body :

Round 1 :

Using colour A work 6 sc in magic ring (6)

Round 2 :

6 inc (12)

Round 3 :

(1 sc, 1 inc) repeat 6 times (18)

Round 4 :

(2 sc, 1 inc) repeat 6 times (24)

Round 5 :

(3 sc, 1 inc) repeat 6 times (30)

Round 6 :

Sc in each st (30)

Round 7-10 :

Change to colour B and continue in sc (30)

Info :

Stop crocheting and place safety eyes between round 5 and 6, considering 8 stitches between the eyes

Round 11-13 :

Change to colour A and continue in sc (30)

Round 14-17 :

Change to colour B and continue in sc (30)

Round 18 :

Change to colour A and continue in sc (30)

Round 19 :

(3 sc, 1 dec) repeat 6 times (24)

Round 20 :

(2 sc, 1 dec) repeat 6 times (18)

Info :

Stop crocheting and start stuffing the bee firmly, optional to fill with dried lavender

Round 21 :

(1 sc, 1 dec) repeat 6 times (12)

Round 22 :

6 dec (6)

Info :

Fasten off leaving a long tail for sewing the last stitches together

β€” Wings :

Info :

Make 2 pieces

Round 1 :

Using colour C work 6 sc in magic ring (6)

Round 2 :

6 inc (12)

Info :

Work a slip stitch and fasten off leaving a long tail for sewing the wings to the bee

Assembly Instructions

  • Sew the wings to the top of the body between the 2 black stripes with 2 rows of space between them to allow room for the chain
  • Chain 40 stitches leaving a tail long enough to pass through the bee body
  • Finish the chain by joining the first stitch with a slip stitch to create a loop
  • Using the 2 long tails from the chain, sew the hanging loop securely to the body
  • Using 3 strands of colour D thread, embroider 2 pink dots 2 rows down from the eyes on each side for cheeks
  • Using 3 strands of colour B thread, create a V-shaped mouth at the front of the face

Important Notes

  • πŸ’‘Leave long tails when fastening off wings and chain pieces to make assembly easier and more secure
  • πŸ’‘Place safety eyes carefully between rounds 5 and 6 with 8 stitches between them before stuffing completely
  • πŸ’‘Stuff the bee firmly for a nice round shape but leave room if adding dried lavender inside
  • πŸ’‘Position wings symmetrically on top of the body with 2 rows between them for balanced appearance
  • πŸ’‘Use consistent tension throughout color changes to maintain smooth stripes without puckering

This cheerful bumblebee keyring pattern is perfect for beginners looking to create something cute and functional in just a few hours. With simple stitches, adorable details, and a practical hanging loop, this little bee is ready to buzz its way onto your keys or bags. The optional lavender filling adds a delightful aromatic touch that makes it extra special. 🐝 Happy crocheting! 🧢✨

You ask,

we answer.

FAQs

Can I use a different yarn weight for this pattern?

While the pattern specifies Natura Just Cotton with a 2.5mm hook, you can use different yarn weights as long as you adjust your hook size accordingly. Keep in mind that using thicker yarn will create a larger bee, while thinner yarn will make a smaller version.

What if I don't have safety eyes?

You can embroider eyes using black yarn or sew on small black buttons as an alternative. If making this for young children, embroidered eyes are actually safer than plastic safety eyes.

How do I keep my color changes neat between the yellow and black stripes?

Change colors at the end of the last stitch of the previous round by pulling the new color through for the final yarn over. Carry the unused color along inside the work and crochet over it to hide the strand and maintain tension.

Can I make the wings larger or more detailed?

Absolutely! You can add more rounds of increases to make larger wings, or even create a more detailed wing shape by experimenting with different stitch patterns. Just remember to adjust the positioning on the body accordingly.

Where can I find dried lavender to add inside the bee?

Dried lavender can be found at craft stores, health food stores, or online. You can also use other dried herbs like chamomile, or simply use regular stuffing material if you prefer an unscented version.