About This Bumble Blossom Black Eyed Susan Amigurumi Pattern
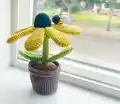
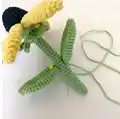
This Bumble Blossom pattern creates a stunning Black Eyed Susan flower complete with a potted base and an adorable bumblebee friend. The design features seven detailed yellow petals, a textured brown center, and a sturdy green stem with leaves. The flower sits perfectly in a handcrafted light brown pot with realistic dirt detail, making it an ideal decoration for any space. The addition of a tiny striped bumblebee adds extra charm and whimsy to this everlasting bloom.
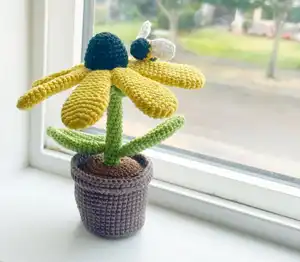
Standing at 12.5cm tall with petals spanning 10cm wide, this cheerful flower makes a perfect gift for plant enthusiasts or anyone who appreciates handmade décor. The pattern includes detailed instructions for creating every component, from the sturdy stem to the adorable bumblebee companion.
Why You'll Love This Bumble Blossom Black Eyed Susan Amigurumi Pattern
I absolutely love this pattern because it brings together everything I adore about crochet—functional art that brightens any space. There's something magical about creating a flower that never wilts, never needs watering, and always stays perfectly sunny. I love how the multiple components come together like a puzzle, each piece adding to the overall charm. The little bumblebee detail makes me smile every time, and I appreciate how the pattern includes thoughtful touches like the stabilized pot base and the realistic dirt insert. This project is rewarding from start to finish, and the result is a piece that brings joy to everyone who sees it.
Switch Things Up
I love experimenting with this pattern to create my own unique variations. One of my favorite modifications is changing the flower color—instead of the classic yellow Black Eyed Susan, I've made pink, purple, and even multicolored versions by switching out the petal yarn. It's amazing how different the flower looks with a simple color swap.
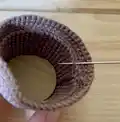
Another fun twist I enjoy is adjusting the pot size. By adding extra rounds to the pot pattern, you can create a taller planter, or by reducing rounds, you get a cute mini version perfect for gifting. I've also decorated the pots with embroidered details or added texture by working in different stitch patterns for the outer rounds.
For a seasonal touch, I sometimes skip the bumblebee and add a tiny ladybug or butterfly instead. You can also create a whole garden by making multiple flowers in different sizes and arranging them together in a larger display. I've even added small flower buds by making petals in earlier rounds and not stuffing them fully.
The leaves offer another opportunity for creativity—try making them in different shades of green or adding veining details with embroidery. I've also experimented with making the flower center in different textures by using loop stitches or popcorn stitches instead of plain single crochet. These small changes can completely transform the final look while keeping the basic structure intact.
Common Mistakes & How to Fix Them
✗ Forgetting to stuff the stem early enough—add stuffing gradually starting after round 10 to maintain proper structure and support
✗ Not centering the dirt hole properly in the pot, which causes the flower to lean or fall over when displayed
✗ Attaching petals with too much space between them instead of positioning them closely side by side for a full, natural flower appearance
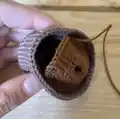
✗ Skipping the cardboard base in the pot bottom, resulting in a wobbly structure that doesn't stand upright properly
✗ Working the dirt top with the wrong side facing up, making the texture appear incorrect when the piece is complete