๐Ÿงถ Beautiful โœจ Detailed ๐Ÿ’ Adorable

Cinnamon Beret Crochet Pattern

Cinnamon Beret Crochet Pattern
4.2โ˜… Rating
5-7 Hours Time Needed
3.9K Made This
โœ‚๏ธ

Beginner Friendly Level

Perfect for those just starting their sewing journey, with clear instructions and simple techniques

โฑ๏ธ

Weekend Treat

Takes 5-7 hours, making it an enjoyable project to finish over a couple of days.

โœจ

Stylish Touch

An elegant detail to elevate any look, combining traditional techniques with contemporary design sensibilities.

About This Cinnamon Beret Crochet Pattern

Cinnamon Beret Crochet Pattern crochet pattern - detailed view of completed project

The pattern includes clear round-by-round instructions with stitch counts to keep you on track. The finished beret measures one size that fits most adults comfortably, with a classic width that can be styled multiple ways for different looks.

Why You'll Love This Cinnamon Beret Crochet Pattern

I'm absolutely in love with how achievable this pattern makes such a chic accessory. The rhythm of working in the round becomes almost meditative, and watching the beret bloom from that tiny magic ring is so satisfying. I appreciate that it uses only basic stitches - single crochet, increases, and decreases - which means even newer crocheters can create something that looks professionally made. The yarn choice is brilliant too, with that wool-acrylic blend providing warmth without being too heavy. What really excites me is how versatile the finished beret is - you can wear it slouchy and artistic or pulled more snugly for a polished look. Plus, it's quick enough to make several in different colors to match your entire wardrobe!

Cinnamon Beret Crochet Pattern step 1 - construction progress Cinnamon Beret Crochet Pattern step 2 - assembly progress Cinnamon Beret Crochet Pattern step 3 - details and accessories Cinnamon Beret Crochet Pattern step 4 - final assembly and finishing

Switch Things Up

I absolutely love playing with color combinations for this classic beret! While the cinnamon shade is gorgeous, I've made versions in deep burgundy, forest green, and even a sunny mustard yellow. Each color completely transforms the vibe - burgundy feels vintage and romantic, while mustard gives off fun, modern energy.

For texture variation, try using a slightly fuzzy yarn like an alpaca blend instead of the smooth acrylic-wool mix. The result is incredibly soft and luxurious feeling. I've also experimented with holding two strands of fingering weight yarn together to create subtle color marbling effects.

One of my favorite modifications is adding a contrasting color for the last 3-4 rounds of the decrease section to create a built-in headband effect. This looks especially striking with complementary colors like navy and cream, or gray and blush pink.

For embellishment lovers, I sometimes crochet a small flower or leaf motif separately and attach it to the side of the beret. You could also add vintage buttons, a fabric bow, or even embroider small details onto the finished beret for personalization. The simple structure of this pattern makes it a perfect canvas for your creative touches!

Common Mistakes & How to Fix Them

โœ— Not maintaining consistent tension throughout the increasing rounds, which can cause the beret crown to pucker or become misshapen instead of lying flat โœ— Forgetting to close each round with a slip stitch before starting the next round, resulting in a visible jog and difficulty tracking rounds โœ— Missing the strategic placement of decreases in rounds thirty-three through thirty-five, which creates the proper band fit around the head circumference โœ— Skipping the washing and blocking step after completion, which is essential for achieving the classic beret shape and drape

Cinnamon Beret Crochet Pattern

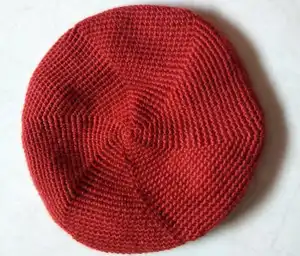
Create this timeless cinnamon beret with a classic silhouette that never goes out of style. This elegant beret is worked from the center outwards using simple single crochet techniques, making it accessible yet impressive. Perfect for cooler weather, this one-size-fits-most design features a 28cm width and 52cm head circumference. The pattern uses a beautiful blend of acrylic and wool yarn that provides warmth and structure while maintaining the classic beret shape. A weekend project that delivers sophisticated results, this beret combines traditional French style with modern crochet techniques.

Beginner Friendly 5-7 Hours

Materials Needed for Cinnamon Beret Crochet Pattern

โ€” Main Fabric

  • 01
    Cisne Cetim yarn, 100g/170m, composition: 70% acrylic and 30% wool, Aran weight (8 wpi)
  • 02
    Approximately 113g of Aran weight yarn in your chosen color

โ€” Tools Required

  • 01
    3.5mm crochet hook (or size needed to obtain gauge)
  • 02
    Stitch marker
  • 03
    Tapestry needle for weaving in ends
  • 04
    Scissors

Progress Tracker

0% Complete

โ€” Start :

Foundation :

Crochet a Magic Loop

Note :

Close all rounds with sl st

Round 1 :

6 sc, sl st. Then insert the marker

โ€” Increase Section :

Round 2 :

6 inc, sl st. Total 12 sc

Round 3 :

*1 inc, 1 sc*, repeat from * to * across, sl st. Total 18 sts

Note :

Continue to increase 6 sts in each Round

Round 4 :

*1 inc, 2 sc*, repeat from * to * across, sl st. Total 24 sts

Round 5 :

*1 inc, 3 sc*, repeat from * to * across, sl st. Total 30 sts

Round 6 :

*1 inc, 4 sc*, repeat from * to * across, sl st. Total 36 sts

Round 7 :

*1 inc, 5 sc*, repeat from * to * across, sl st. Total 42 sts

Round 8 :

*1 inc, 6 sc*, repeat from * to * across, sl st. Total 48 sts

Round 9 :

*1 inc, 7 sc*, repeat from * to * across, sl st. Total 54 sts

Round 10 :

*1 inc, 8 sc*, repeat from * to * across, sl st. Total 60 sts

Round 11 :

*1 inc, 9 sc*, repeat from * to * across, sl st. Total 66 sts

Round 12 :

*1 inc, 10 sc*, repeat from * to * across, sl st. Total 72 sts

Round 13 :

*1 inc, 11 sc*, repeat from * to * across, sl st. Total 78 sts

Round 14 :

*1 inc, 12 sc*, repeat from * to * across, sl st. Total 84 sts

Round 15 :

*1 inc, 13 sc*, repeat from * to * across, sl st. Total 90 sts

Round 16 :

*1 inc, 14 sc*, repeat from * to * across, sl st. Total 96 sts

Round 17 :

*1 inc, 15 sc*, repeat from * to * across, sl st. Total 102 sts

Round 18 :

*1 inc, 16 sc*, repeat from * to * across, sl st. Total 108 sts

Round 19 :

*1 inc, 17 sc*, repeat from * to * across, sl st. Total 114 sts

Round 20 :

*1 inc, 18 sc*, repeat from * to * across, sl st. Total 120 sts

Round 21 :

*1 inc, 19 sc*, repeat from * to * across, sl st. Total 126 sts

Round 22 :

*1 inc, 20 sc*, repeat from * to * across, sl st. Total 132 sts

Round 23 :

*1 inc, 21 sc*, repeat from * to * across, sl st. Total 138 sts

Round 24 :

*1 inc, 22 sc*, repeat from * to * across, sl st. Total 144 sts

Round 25 :

*1 inc, 23 sc*, repeat from * to * across, sl st. Total 150 sts

Round 26 :

*1 inc, 24 sc*, repeat from * to * across, sl st. Total 156 sts

Note :

Total 26 Rounds with increases

โ€” Decrease Section :

Round 27 :

*sc2tog, 24 sc*, repeat from * to * across, sl st. Total 150 sts

Round 28 :

*sc2tog, 23 sc*, repeat from * to * across, sl st. Total 144 sts

Round 29 :

*sc2tog, 22 sc*, repeat from * to * across, sl st. Total 138 sts

Round 30 :

*sc2tog, 21 sc*, repeat from * to * across, sl st. Total 132 sts

Round 31 :

*sc2tog, 20 sc*, repeat from * to * across, sl st. Total 126 sts

Round 32 :

*sc2tog, 19 sc*, repeat from * to * across, sl st. Total 120 sts

Round 33 :

*sc2tog, 1 sc, sc2tog, 15 sc*, repeat from * to * across, sl st. Total 108 sts

Round 34 :

*sc2tog, 1 sc, sc2tog, 13 sc*, repeat from * to * across, sl st. Total 96 sts

Round 35 :

*sc2tog, 1 sc, sc2tog, 11 sc*, repeat from * to * across, sl st. Total 84 sts

Last Round :

*1 sl st, ch1*, repeat from * to * across, sl st

Assembly Instructions

  • Weave in all loose ends securely using your tapestry needle, making sure they're hidden within the stitches
  • Wash the beret gently in lukewarm water with mild detergent suitable for wool blends
  • Block the beret by shaping it over a dinner plate or beret blocking form to achieve the classic flat crown shape
  • Allow to dry completely while maintaining the blocked shape before wearing

Important Notes

  • ๐Ÿ’กAlways close each round with a slip stitch before beginning the next round to maintain proper shaping
  • ๐Ÿ’กUse a stitch marker to track the beginning of each round and prevent losing your place
  • ๐Ÿ’กCheck your gauge before starting - 18 sts and 18 rows per 10cm in single crochet is essential for proper fit
  • ๐Ÿ’กThe pattern increases by 6 stitches in each round through round 26, creating the classic beret crown
  • ๐Ÿ’กBlocking is not optional for this project - it's essential to achieve the proper beret shape and drape
  • ๐Ÿ’กThe final round creates a decorative edge that helps the beret sit nicely on your head

This classic Cinnamon Beret pattern brings timeless French elegance into your crochet wardrobe with simple techniques that any beginner can master. The construction from center outward creates a meditative rhythm while you watch your beret take shape round by round. Perfect for gift-giving or adding sophisticated style to your own collection, this pattern proves that beautiful accessories don't require complex stitches. The one-size design fits most adults comfortably and can be styled multiple ways. ๐Ÿงถ Happy crocheting! ๐ŸŽ€โœจ

You ask,

we answer.

FAQs

Can I adjust the size of this beret to fit a smaller or larger head?

Yes! For a smaller beret, stop the increase rounds earlier (around round 23-24) and adjust the decrease rounds accordingly. For a larger beret, add 2-3 more increase rounds before starting the decreases. Always check the circumference against your head measurement during the decrease section.

What yarn weight can I substitute for Aran weight?

You can use DK weight with a 3mm hook for a lighter beret, or bulky weight with a 5mm hook for a thicker, warmer version. The key is to maintain the gauge and adjust your hook size accordingly. Always work a gauge swatch first to ensure proper fit.

Why is blocking so important for this beret pattern?

Blocking is essential because it sets the classic flat crown shape that defines a beret. Without blocking, the beret may look more like a slouchy beanie. Blocking also evens out your stitches and gives the finished piece a professional appearance with proper drape.

How do I prevent the magic ring from coming undone?

After completing round 1, pull the tail firmly to close the ring completely, then weave the tail through several stitches on the wrong side. You can also tie a small knot with the tail before weaving it in for extra security.

Can I add a decorative element or embellishment to this beret?

Absolutely! You can add a crocheted flower, button, or brooch to the side of the beret for extra flair. You could also work the final round in a contrasting color, or add a ribbon band around the decrease section for a vintage look.