Crochet Daisy Market Bag Pattern – Summer Floral Shoulder Bag
Beginner Friendly
Perfect for those just starting their crochet journey, with clear instructions and simple techniques
Single-Day Project
A satisfying project you can complete in a single afternoon or evening.
Handmade Gift
A beautiful keepsake — free forever. Read online or print at home.
About This Crochet Daisy Market Bag Pattern – Summer Floral Shoulder Bag
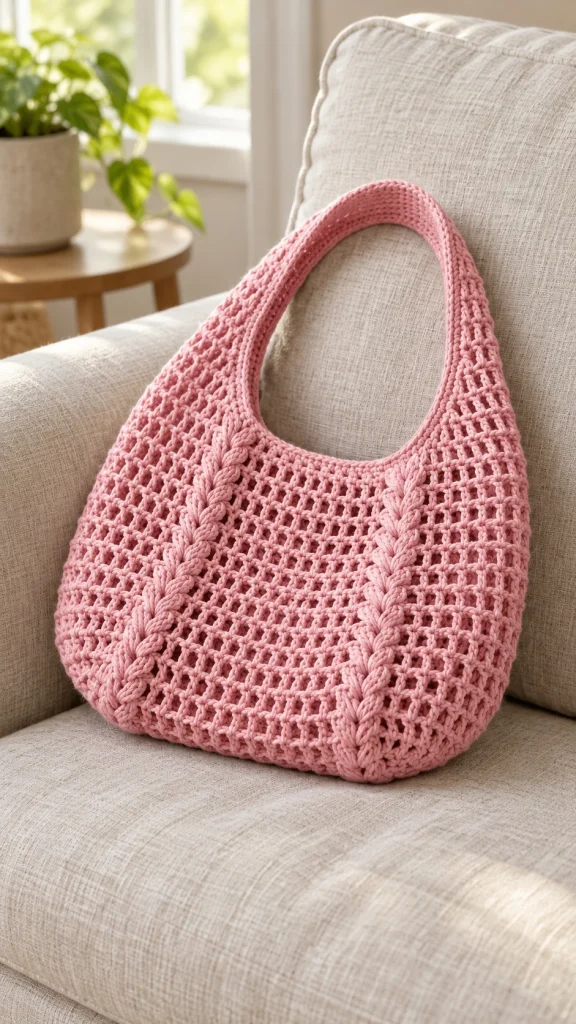
This crochet daisy market bag combines a soft cream cotton body, an airy openwork texture, raised decorative panels and tiny white crochet daisies for a fresh handmade look.
The bag is worked with a roomy rounded body and a long integrated shoulder strap. Small daisies are attached across the front at irregular intervals, while textured vertical sections add structure and make the simple neutral color much more interesting.
Materials
- DK / Light #3 cotton yarn – warm cream 350-450 g
- DK cotton yarn – white 25-35 g
- DK cotton yarn – golden yellow 10-15 g
- DK cotton yarn – soft leaf green 10-15 g
- 3.5 mm crochet hook 1
- Yarn needle 1
- Scissors 1 pair
- Stitch markers 4-6
- Cotton fabric for optional lining approximately 45 × 80 cm
Abbreviations
MRmagic ringchchainsl stslip stitchscsingle crochethdchalf double crochetdcdouble crochettrtreble crochetFPdcfront post double crochetBPdcback post double crochetskskipspspaceststitchstsstitchesFOfasten offFinished Size
- Bag body: approximately 38 cm / 15 in wide
- Bag height: approximately 34 cm / 13.5 in
- Overall height with strap: approximately 65-70 cm / 25.5-27.5 in
- Strap width: approximately 5-6 cm / 2-2.4 in
- Daisies: approximately 3-4 cm / 1.2-1.6 in
Construction
The bag consists of:
- 1 oval crochet base
- 1 continuous openwork body
- 3 raised textured vertical sections on the front
- 1 long integrated shoulder strap
- Approximately 10-12 small crochet daisies
- Small green leaves
- Optional fabric lining
Part 1 – Oval Bag Base
Using warm cream yarn, ch 42.
R1: Beginning in second ch from hook, sc in next 40 ch, 5 sc in final ch. Continue along opposite side of foundation chain, sc in next 40 ch, 4 sc in final ch. Join with sl st.
R2: ch 1, sc around, working 2 sc into each of the curved-end increase stitches as needed to keep the base flat.
R3: Repeat evenly spaced increases around both rounded ends.
R4: sc around, increasing approximately 6 sts across each curved end.
R5: sc around without increasing.
The base should measure approximately 34-36 cm long and 9-10 cm wide.
Part 2 – Transition to the Bag Body
R6: Work 1 round of sc in BLO around the entire base.
This creates a clean fold line and allows the body to rise vertically.
R7: sc around.
R8: ch 3, dc around. Join with sl st.
Part 3 – Main Open Mesh Stitch
The body uses a light mesh pattern.
Mesh Round A: ch 3, *dc in next st, ch 1, sk 1 st* around. Join.
Mesh Round B: ch 3, *dc in next dc, ch 1, dc into next dc* around, placing each dc directly above the dc from the previous round.
Repeat these mesh rounds while keeping the stitch count consistent.
Part 4 – Establish the Textured Front Panels
Lay the bag flat and mark the center front.
Create three vertical textured sections:
- one approximately 8 cm left of center,
- one near the center,
- one approximately 8 cm right of center.
Each textured section should be approximately 5 stitches wide.
Continue the normal mesh pattern everywhere else.
Part 5 – Raised Cable-Style Panel
For each marked panel, replace the mesh stitches with:
Row A: FPdc around next 2 dc, dc in center st, FPdc around next 2 dc.
Row B: BPdc around next 2 sts, dc in center, BPdc around next 2 sts.
Row C: Skip first 2 post stitches, FPdc around next 2 post stitches, then work FPdc around the 2 skipped stitches to create a crossed cable effect.
Repeat Rows A-C vertically while continuing the surrounding mesh.
Part 6 – Build the Bag Body
Continue working the mesh and textured panels until the body measures approximately 30-32 cm from the base.
For a roomy bag, work approximately 26-30 rounds, depending on your yarn and tension.
Try to finish after a plain mesh round before beginning the upper shaping.
Part 7 – Upper Edge
Work:
R1: sc around.
R2: hdc around.
R3: sc around.
This creates a stronger upper edge before forming the shoulder strap.
Part 8 – Mark the Strap Sections
Lay the bag flat.
Mark approximately 18-20 stitches at each side of the bag.
These stitches will become the integrated shoulder strap.
The center-front and center-back sections will gradually decrease to create the curved opening.
Part 9 – Shape the Left Strap
Join cream yarn at the first side marker.
Row 1: sc across the marked strap stitches. Turn.
Row 2: ch 1, sc2tog, sc across to final 2 sts, sc2tog. Turn.
Repeat Row 2 until approximately 10-12 stitches remain.
Continue straight in sc until the strap measures approximately 35-40 cm from the top of the bag.
FO.
Part 10 – Shape the Right Strap
Repeat the same instructions on the opposite side.
Make sure both strap sections contain the same number of rows.
Before joining, hold the bag against your shoulder and adjust the length if necessary.
Part 11 – Join the Shoulder Strap
Place the two strap ends together with right sides facing.
Join using slip stitches or whip stitch.
Turn the seam toward the inside.
For additional strength, sew across the seam a second time using matching yarn.
Part 12 – Strap Edging
Join cream yarn at the upper edge of the bag.
Work sc evenly around the entire inner opening and along both sides of the strap.
At the shoulder section, keep the stitches relaxed so the strap remains flexible.
Work a second round of sc if you want a firmer strap.
Part 13 – Small Daisy Center
Using golden yellow yarn:
R1: MR, 8 sc into ring.
Join with sl st.
FO, leaving a small tail.
Part 14 – Daisy Petals
Join white yarn into any yellow stitch.
In each stitch around work:
(ch 3, 2 dc, ch 3, sl st in same st)
Repeat around to create 8 petals.
FO.
Gently shape each petal with your fingers.
Part 15 – Small Green Leaf
Using soft green yarn:
Ch 6.
Beginning in second ch from hook:
sl st, sc, hdc, dc, 5 dc in final ch.
Continue along opposite side:
dc, hdc, sc, sl st.
FO leaving a long sewing tail.
Part 16 – Make the Flower Set
Make approximately:
- 10-12 white daisies
- 8-10 tiny green leaves
Not every daisy needs a leaf. Leaving a few flowers without leaves creates a more natural scattered look.
Part 17 – Arrange the Daisies
Lay the finished bag flat before sewing.
Scatter the flowers asymmetrically across the front.
Place some daisies close to the textured vertical panels and others in the open mesh sections.
Avoid placing them in perfectly straight rows.
For a similar arrangement, position:
- 2 flowers near the upper section,
- 3-4 across the middle,
- 4-5 toward the lower half,
- 1-2 near the side edges.
Part 18 – Sew on the Flowers
Using the yellow or white yarn tails, sew each flower securely through its center.
Add one or two small stitches beneath selected petals so they remain flat against the bag.
Do not stitch every petal down.
Leaving the petal tips free creates the soft dimensional appearance.
Part 19 – Attach the Leaves
Place one small green leaf beside selected daisies.
Sew through the center vein of the leaf using green yarn.
Allow the outer leaf edges to remain slightly raised.
Part 20 – Strengthen the Bottom
If the bag will carry heavier items, work one additional round of slip stitches around the bottom edge.
You can also cut an oval piece of plastic canvas slightly smaller than the base and place it inside the optional lining.
Optional Fabric Lining
- Lay the finished bag flat and trace its body shape onto cotton fabric.
- Add approximately 1.5 cm seam allowance.
- Cut two identical pieces.
- Sew the sides and bottom together.
- Fold the upper raw edge inward.
- Insert the lining into the crochet bag.
- Hand sew the lining beneath the upper crochet edge using small hidden stitches.
A lining is especially useful if you plan to carry keys, cosmetics or other small objects that could slip through the openwork stitches.
Optional Inner Pocket
Cut a rectangle of lining fabric approximately 18 × 15 cm.
Fold the edges inward and sew the pocket to one lining panel before assembling the lining.
This creates a convenient place for a phone or keys.
Finishing
- Weave in all remaining yarn ends.
- Check every flower attachment.
- Gently steam or wet block the bag.
- Shape the bottom corners while damp.
- Straighten the shoulder strap.
- Arrange the daisies and leaves by hand.
- Allow the bag to dry completely before using.
Color Ideas
- Classic daisy: cream + white + yellow + soft green
- Vintage floral: oatmeal + dusty pink + mustard + sage
- Summer: ivory + sky blue + lemon yellow
- Romantic: cream + blush pink + burgundy
- Autumn: beige + rust + mustard + olive
- Coastal: natural cotton + navy + pale blue
Finishing Checklist
- Crochet the oval base.
- Build the lower solid edge.
- Work the open mesh body.
- Add the three raised textured panels.
- Shape both sides into the shoulder strap.
- Join and reinforce the strap.
- Crochet 10-12 daisies.
- Make the small green leaves.
- Arrange the flowers asymmetrically.
- Sew all embellishments securely.
- Add an optional fabric lining.
- Weave in every yarn end.
- Block and shape the finished bag.
Frequently Asked Questions
Cotton or a cotton-rich blend works particularly well because it gives the mesh good stitch definition and helps the bag keep its shape. DK cotton creates a soft but structured result.
Some stretching is normal, especially when the bag is full. Working the strap tightly, adding a firm single-crochet edging and using cotton yarn will help reduce stretching.
Yes. Begin with a longer foundation chain for the oval base and add additional body rounds before shaping the strap. Keep the textured panels evenly spaced as the width increases.
Yes. Continue the open mesh stitch across the entire body for a simpler and faster version. The daisies will still give the bag plenty of detail.
A lining is optional. For beach items, yarn or larger objects, the open bag can be used as it is. A lining is recommended for everyday use when carrying smaller belongings.
Yes. Small sunflowers, forget-me-nots, roses or simple five-petal flowers can replace the daisies while keeping the same bag construction.
Hand wash gently in cool water with mild detergent. Press out excess water without twisting, reshape the bag and strap, then lay flat to dry.
The finished Crochet Daisy Market Bag Pattern – Summer Floral Shoulder Bag

