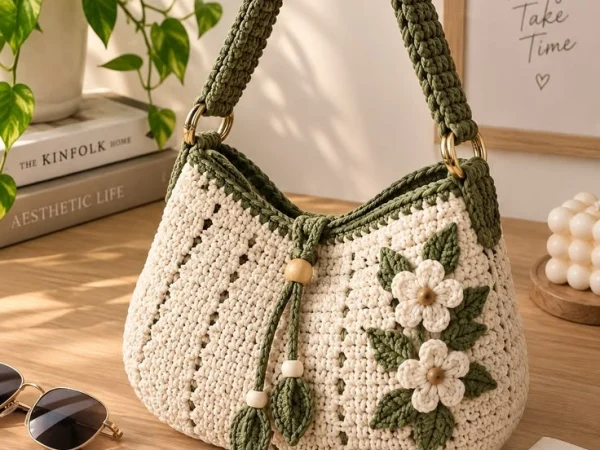
Romantic Crochet & Fabric Tote Bag Pattern
Beginner Friendly
Perfect for those just starting their crochet journey, with clear instructions and simple techniques
Single-Day Project
A satisfying project you can complete in a single afternoon or evening.
Handmade Gift
A beautiful keepsake — free forever. Read online or print at home.
About This Romantic Crochet & Fabric Tote Bag Pattern
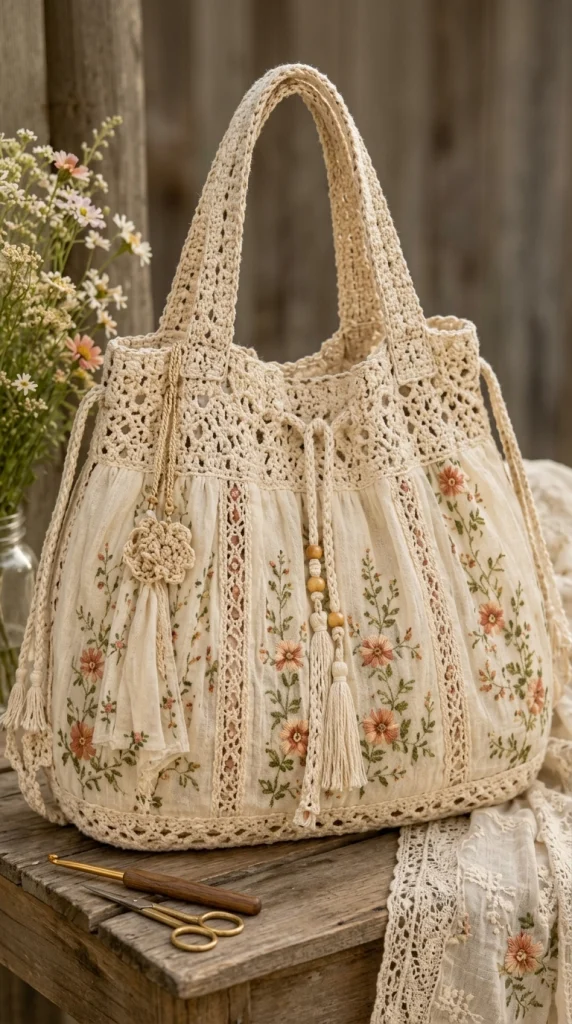
This crochet fabric tote bag pattern combines delicate crochet lace with soft floral fabric to create a romantic, vintage-inspired bag. The upper section is crocheted in an airy lace stitch, while the lower body uses gathered cream floral fabric separated by narrow crochet lace panels.
Long crocheted shoulder handles, a drawstring closure, wooden beads, tassels and a small crochet flower charm give the finished bag its beautiful handmade character. The design works especially well with linen, cotton or muslin fabric embroidered or printed with tiny botanical flowers.
Materials
- DK cotton yarn in natural cream approximately 300-350 g
- Floral cotton, linen or muslin fabric approximately 70 x 100 cm
- Optional plain cotton lining fabric approximately 70 x 100 cm
- 3.0 mm crochet hook main crochet work
- 2.5 mm crochet hook optional finer lace inserts
- Wooden beads 4-6 beads
- Cotton cord or matching crochet chains for drawstring
- Embroidery thread optional for adding floral details
- Sewing thread cream
- Sewing needle or sewing machine 1
- Yarn needle 1
- Scissors 1 pair
- Stitch markers 4
- Measuring tape 1
- Iron for preparing fabric panels
Abbreviations
chchainsl stslip stitchscsingle crochethdchalf double crochetdcdouble crochettrtreble crochetspspaceskskipststitchMRmagic ringFOfasten offFinished Measurements
- Bag width: approximately 38 cm
- Bag height: approximately 36 cm
- Base depth: approximately 10-12 cm
- Handle length: approximately 65 cm each
- Handle width: approximately 3.5 cm
- Upper crochet section: approximately 11-12 cm deep
Prepare the Floral Fabric Body
- Cut two floral fabric rectangles measuring approximately 45 x 34 cm.
- Press the fabric carefully before sewing.
- Along the upper edge of each rectangle, make small evenly spaced gathers until each panel measures approximately 38 cm wide.
- Place the panels right sides together.
- Sew both side seams using approximately a 1 cm seam allowance.
- Sew across the bottom edge.
- To create depth, flatten each bottom corner into a triangle.
- Measure approximately 5 cm from the point and sew straight across.
- Trim the excess corner fabric.
- Turn the bag right side out and press gently.
Optional Fabric Lining
- Cut two lining rectangles using the same measurements as the floral body.
- Sew the side and bottom seams.
- Box the bottom corners in the same way as the outer bag.
- Leave the lining wrong side out.
- Insert it inside the floral bag so wrong sides face each other.
- Align the upper edges and baste them together.
Upper Crochet Lace Band
- With cream yarn and 3.0 mm hook, ch 161 or a multiple of 4 + 1 long enough to fit around the upper edge of your fabric bag.
- Join carefully with a sl st, making sure the chain is not twisted.
- Round 1: Ch 1, sc in every ch around. Join with sl st.
- Round 2: Ch 4, sk 1 st, dc in next st, *ch 1, sk 1, dc in next st*. Repeat around.
- Round 3: Ch 3, work 2 dc into first ch-1 sp, *ch 2, 2 dc into next ch-1 sp*. Repeat around.
- Round 4: Sl st into first ch-2 sp, ch 3, 3 dc in same sp, *ch 2, 4 dc in next ch-2 sp*. Repeat around.
- Round 5: Ch 1, sc in each dc and work 2 sc into every ch-2 sp.
- Round 6: Ch 5, sk 2 sts, sc in next st, *ch 5, sk 2 sts, sc in next st*. Repeat around.
- Round 7: Sl st into first ch-5 sp, ch 3, 4 dc in same sp, *sc in next ch-5 sp, 5 dc in next ch-5 sp*. Repeat around.
- Round 8: Ch 4, *dc in center dc of next shell, ch 2*. Repeat around.
- Round 9: Ch 1, sc evenly around.
- Repeat Rounds 6-9 once more if additional height is needed.
- FO and weave in ends.
Attach Crochet Band to Fabric
- Place the lower edge of the crochet band approximately 1.5 cm over the gathered fabric edge.
- Pin or clip it evenly around the bag.
- Hand sew using small invisible stitches or machine sew slowly with matching thread.
- Check that the gathers remain evenly distributed.
- Secure the lining beneath the same seam if using one.
Vertical Crochet Lace Strips – Make 4
- Ch 43 or enough chains to reach from the upper crochet band to the bottom border.
- Row 1: Sc in second ch from hook and across.
- Row 2: Ch 4, sk 2 sts, dc in next, *ch 1, sk 1, dc in next*. Repeat across.
- Row 3: Ch 1, sc in first st, *3 dc in ch-1 sp, sc in next dc*. Repeat across.
- FO leaving a long sewing tail.
- Block each strip gently.
- Position the strips vertically over selected seams or between the floral sections.
- Hand sew both long edges to the fabric using small stitches.
Bottom Crochet Border
- Join cream yarn around the lower edge of the fabric body or crochet a separate band to the required circumference.
- Round 1: Sc evenly around.
- Round 2: Ch 4, sk 1, dc in next, *ch 1, sk 1, dc in next*. Repeat around.
- Round 3: Ch 1, sc in first sp, *5 dc in next sp, sc in next sp*. Repeat around.
- FO and weave in ends.
- If worked separately, sew the border neatly around the bottom of the bag.
Long Crochet Handles – Make 2
- Ch 121 or enough chains to measure approximately 65 cm.
- Row 1: Sc in second ch from hook and across.
- Row 2: Ch 3, turn, dc in each st across.
- Row 3: Ch 4, turn, sk 1 st, dc in next, *ch 1, sk 1, dc in next*. Repeat across.
- Row 4: Ch 3, turn, dc in each dc and each ch-1 sp across.
- Row 5: Ch 1, turn, sc across.
- FO and weave in ends.
- Block each handle so both are exactly the same length.
Attach the Handles
- Position one handle on the front and one on the back of the bag.
- Place each handle end approximately 8-9 cm from the nearest side seam.
- Overlap approximately 5 cm of each handle end onto the crochet band.
- Pin securely.
- Sew a rectangle around each attachment area.
- Add a diagonal X through the rectangle for extra strength.
- Repeat for all four attachment points.
Drawstring – Make 2
- Ch approximately 100 or until the cord measures about 55-60 cm.
- Sl st into every chain for a stronger rounded cord.
- FO.
- Thread one cord through the open spaces of the upper crochet band from the left side.
- Thread the second cord from the opposite side.
- Add wooden beads to the ends.
- Knot securely beneath each bead.
Long Tassels – Make 2
- Wrap cream cotton yarn approximately 35 times around a 12 cm piece of cardboard.
- Thread a strong strand beneath the upper loops and tie tightly.
- Remove the yarn bundle from the cardboard.
- Wrap another strand approximately 1.5 cm below the top to form the tassel neck.
- Cut the bottom loops.
- Trim the strands evenly.
- Attach one tassel to each drawstring end beneath the wooden beads.
Crochet Flower Charm
- With cream yarn, make an MR.
- Round 1: Work 10 sc into MR. Join with sl st.
- Round 2: *Ch 5, sl st into next st*. Repeat around to create 10 loops.
- Round 3: Into each ch-5 loop work sc, hdc, 3 dc, hdc, sc.
- Round 4: Working behind the petals, *ch 6, sl st around the base between petals*. Repeat around.
- Round 5: Into each ch-6 loop work sc, hdc, 5 dc, hdc, sc.
- FO and weave in ends.
- Attach a long crochet cord to the flower.
- Add one or two small wooden beads.
- Hang the charm from one handle attachment as shown in the inspiration.
Optional Floral Embroidery
- If using plain cream linen instead of printed fabric, lightly sketch tiny flower stems across the fabric before assembling the bag.
- Use green embroidery thread for stems and leaves.
- Work small lazy-daisy stitches in dusty peach, muted rose and cream for the petals.
- Add French knots in warm brown or mustard for flower centers.
- Keep the flowers scattered rather than perfectly symmetrical for a natural vintage look.
- Press the embroidery from the wrong side before assembling the fabric body.
Final Assembly
- Check that all fabric seams are hidden beneath the lining or crochet trim.
- Sew the upper crochet band securely to the gathered fabric body.
- Attach all vertical lace strips.
- Add the lower crochet border.
- Reinforce both handles.
- Thread the drawstrings through the upper lace openings.
- Add wooden beads and tassels.
- Attach the crochet flower charm.
- Steam-block only the crochet portions, protecting the fabric from excessive heat.
- Allow the bag to dry completely before using it.
Tips for Success
- Choose a soft fabric with small botanical flowers to keep the romantic cottage-style appearance.
- Use mercerized or tightly spun cotton yarn if you want the lace motifs to look especially crisp.
- Gather the fabric gradually instead of making several large pleats.
- Block every crochet strip before sewing it onto the fabric.
- For an everyday bag, add a full cotton lining and reinforce the base with interfacing.
- Keep the handles relatively firm because cotton crochet can stretch after repeated use.
Common Mistakes to Avoid
- Making the crochet band before measuring the fabric: Always measure the finished gathered fabric circumference first.
- Stretching the crochet while sewing: Let the crochet sit naturally against the fabric or the bag opening may ripple.
- Weak handle attachments: Sew through several layers and reinforce each attachment point.
- Using very heavy fabric: Lightweight linen, cotton or muslin creates the soft gathered appearance more successfully.
- Skipping the lining: A lining is strongly recommended if the bag will carry everyday items.
Ways to Customize the Bag
- Use plain linen and hand-embroider your own wildflower design.
- Replace the peach flowers with lavender, blue or sage botanical prints.
- Add an interior zipper pocket to make the bag more practical.
- Use vintage wooden buttons instead of beads.
- Make shorter handles for a handbag version.
- Add a detachable long strap for a crossbody option.
- Replace the tassels with crochet flowers for an entirely crocheted finish.
Frequently Asked Questions
Yes. Replace the floral fabric panels with solid or lightly textured crochet panels. However, using fabric creates the soft gathered body and vintage textile appearance that makes this design distinctive.
Lightweight cotton, linen, cotton-linen blends and muslin work particularly well. Avoid very stretchy fabric because it can distort where it meets the crochet.
Add a cotton lining, medium-weight interfacing and a reinforced base. Sew the handle attachments through the crochet, outer fabric and lining together.
Yes. For a hand-carry tote, make each handle approximately 40-45 cm long. For comfortable shoulder handles similar to the inspiration, aim for approximately 60-70 cm.
If all materials are washable, gently hand wash in cool water and reshape while damp. Remove detachable wooden decorations first and avoid twisting or wringing the crochet lace.
The finished Romantic Crochet & Fabric Tote Bag Pattern