🧢 Beautiful ✨ Detailed πŸ’ Adorable

Buzz Lightyear Amigurumi Pattern

Buzz Lightyear Amigurumi Pattern
4.1β˜… Rating
6-8 Hours Time Needed
2.9K Made This
βœ‚οΈ

Intermediate Level

Ideal for those with basic knitting experience, featuring slightly more advanced stitches and techniques to expand your skills.

⏱️

All-Day Adventure

Requires 8-10 hours, ideal for a full day of immersive knitting.

🧸

Cute Companion

An adorable friend to cherish, handcrafted with love to bring comfort and joy for years to come.

About This Buzz Lightyear Amigurumi Pattern

This Buzz Lightyear pattern captures the beloved Space Ranger in perfect miniature form. The pattern features multiple color changes to recreate his iconic green and white space suit, complete with grey and purple accents. With detailed instructions for his distinctive purple hood with ear details, embroidered facial features, and his signature chest emblem, every element brings Buzz to life. The pattern includes careful shaping for his head, body, legs, and arms to create the authentic Buzz Lightyear silhouette that fans will instantly recognize.

Buzz Lightyear Amigurumi Pattern crochet pattern - detailed view of completed project

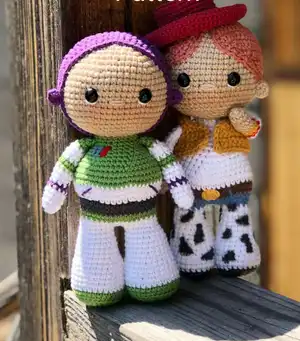
Working with various yarn colors and mastering color transitions, you'll create a character full of personality and charm. The finished amigurumi stands at approximately 15-18cm tall, making it the perfect size for display or play.

Why You'll Love This Buzz Lightyear Amigurumi Pattern

I absolutely love this pattern because it brings one of the most iconic animated characters to life in such an approachable way! The color work might seem intimidating at first, but I found the transitions create such a satisfying result as you watch Buzz take shape row by row. What really makes this pattern special is how the simple embroidered details like the chest emblem and facial features add so much personality without complicated techniques. I love that you can customize the facial expression and really make each Buzz unique. The combination of different textures and colors keeps the project engaging from start to finish, and seeing that recognizable green and white suit come together is incredibly rewarding. Plus, the joy on someone's face when they receive this handmade Buzz Lightyear makes every stitch worthwhile!

Buzz Lightyear Amigurumi Pattern step 1 - construction progress Buzz Lightyear Amigurumi Pattern step 2 - assembly progress Buzz Lightyear Amigurumi Pattern step 3 - details and accessories Buzz Lightyear Amigurumi Pattern step 4 - final assembly and finishing

Switch Things Up

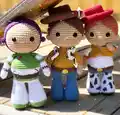
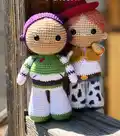
I love how versatile this Buzz Lightyear pattern is once you master the basic structure! You could easily adapt this design to create other Toy Story characters by changing the color schemes and accessories. For example, use cowboy colors for Woody, or pink and white for Bo Peep.

Try experimenting with different yarn weights to create various sizesβ€”using bulky yarn with a larger hook makes a cuddly oversized version, while thinner thread creates a miniature collectible. You could even make a whole set of different-sized Buzz figures to create a fun display.

Consider adding extra details like felt accents for the wings or buttons, or embroider additional details on the suit for more dimension. Some crafters like to add a small cape or create removable accessories.

For a modern twist, try using variegated or sparkly yarn for the suit sections to give Buzz a cosmic, space-themed look. Metallic thread in the embroidery can make the chest emblem really pop.

You could also personalize each Buzz by varying the facial expressionsβ€”try different eye positions or add eyebrows for different personalities. Some crafters make serious Buzz, happy Buzz, or even sleepy Buzz versions.

If you're making this as a gift, consider adding a small voice box or squeaker inside before closing up the body for an interactive element that kids will love. Just make sure it's securely enclosed and won't create a choking hazard.

Common Mistakes & How to Fix Them

βœ— Forgetting to insert safety eyes between rounds 15-16 before stuffing the head completely, making it difficult to position them correctly later βœ— Not maintaining consistent tension during color changes, which can create gaps or loose stitches at the transition points between colors βœ— Overstuffing the body and limbs, which distorts the shape and makes it difficult to sew pieces together cleanly and securely βœ— Skipping the BLO (back loops only) rounds which create important texture details and definition between the costume sections βœ— Not securing color changes properly when switching yarns, leading to loose ends that can unravel or show through the finished piece βœ— Placing ears too close or too far from the eyes, throwing off the proportions and overall appearance of Buzz's face

Buzz Lightyear Amigurumi Pattern

Create your very own Buzz Lightyear amigurumi with this detailed crochet pattern! This adorable space ranger stands ready for adventure with his iconic green and white suit, purple hood detail, and signature emblem. Perfect for Toy Story fans and crochet enthusiasts alike, this pattern guides you through creating Buzz's distinctive features including his detailed costume with color changes and embroidered accents. Whether you're crafting for a Disney collector or making a special gift, this charming amigurumi brings everyone's favorite space hero to life in soft, huggable form.

Intermediate 6-8 Hours

Materials Needed for Buzz Lightyear Amigurumi Pattern

β€” Main Fabric

  • 01
    Alize Cotton Gold in color 126 (beige/tan for skin tone)
  • 02
    Alize Cotton Gold in color 152 (white for suit details)
  • 03
    Alize Cotton Gold in color 55 (green for suit)
  • 04
    Drops Love You 7 in color 10 (purple for hood)
  • 05
    Drops I Love You 7 in color 04 (grey for suit accents)
  • 06
    Small amounts of blue and red yarn for embroidering the chest emblem

β€” Tools Required

  • 01
    Crochet hook size 2mm
  • 02
    Fiber filling/stuffing
  • 03
    Tapestry needle for sewing
  • 04
    Scissors
  • 05
    Plastic safety eyes 7-8mm diameter
  • 06
    Stitch markers (recommended)
  • 07
    Embroidery needle for detail work

Progress Tracker

0% Complete

β€” Head

Start working with main color:

Round 1:

6 sc in mr

Round 2:

6 inc (12)

Round 3:

(1 sc, inc) x 6 (18)

Round 4:

(2 sc, inc) x 6 (24)

Round 5:

(3 sc, inc) x 6 (30)

Round 6:

(4 sc, inc) x 6 (36)

Round 7:

(5 sc, inc) x 6 (42)

Round 8:

(6 sc, inc) x 6 (48)

Round 9:

(7 sc, inc) x 6 (54)

Round 10-19:

54 sc

Info:

Between the 15-16 rows insert safety eyes, 7-8 mm in diameter

Round 20:

(7 sc, dec) x 6 (48)

Round 21:

(6 sc, dec) x 6 (42)

Info:

Stuff

Round 22:

(5 sc, dec) x 6 (36)

Round 23:

(4 sc, dec) x 6 (30)

Round 24:

(3 sc, dec) x 6 (24)

Round 25:

(2 sc, dec) x 6 (18)

Round 26:

(1 sc, dec) x 6 (12)

Info:

Stuff

β€” Detail for head

Start working with purple yarn color:

Round 1:

6 sc in mr

Round 2:

6 inc (12)

Round 3:

(1 sc, inc) x 6 (18)

Round 4:

(2 sc, inc) x 6 (24)

Round 5:

(3 sc, inc) x 6 (30)

Round 6:

(4 sc, inc) x 6 (36)

Round 7:

(5 sc, inc) x 6 (42)

Round 8:

(6 sc, inc) x 6 (48)

Round 9:

(7 sc, inc) x 6 (54)

Round 10-16:

54 sc

Round 17:

(hdc, 2 dc, 2 inc (dc), 2 dc, hdc, 2 sc) x 2, 34 sc (58)

Round 18:

(hdc, dc x 8, hdc, 2 sc) x 2, 34 sc (58)

Round 19:

22 hdc, 36 sc (58)

Round 20:

58 sc

Info:

Leave a long tail for sewing. Sew the detail on the head

β€” Ears (x2)

Start working with purple color:

Round 1:

6 sc in mr

Info:

Leave a long tail for sewing

β€” Start forming head

Info 1:

Between the 16-17 rows sew on ears. Distance from ears to eyes 5-6 sc

Info 2:

Embroider nose

Info 3:

Start forming eyes: Embroider eyes: insert the white threaded needle on bottom of the eye and thread it to the bottom as shown in the picture. Bring the thread out near the second eye and repeat the same steps

Info 4:

Toned cheeks

β€” Legs (x2)

Start working with green color:

Round 1:

6 sc in mr

Round 2:

6 inc (12)

Round 3:

(1 sc, inc) x 6 (18)

Round 4:

(2 sc, inc) x 6 (24)

Round 5:

(3 sc, inc) x 6 (30)

Round 6:

BLO 30 sc

Round 7:

30 sc

Round 8:

Change yarn color to the white color: 30 sc

Round 9:

(8 sc, dec) x 3 (27)

Round 10-11:

27 sc

Round 12:

(7 sc, dec) x 3 (24)

Round 13:

24 sc

Round 14:

(6 sc, dec) x 3 (21)

Round 15-16:

21 sc

Round 17:

(5 sc, dec) x 3 (18)

Round 18:

18 sc

Round 19:

(4 sc, dec) x 3 (15)

Info:

Stuff. Crochet second leg the same way and continue crocheting the body. Do not cut off the thread on the second leg and continue crocheting the body. The gap between the legs should be 3 ch

β€” Body

Round 1:

15 sc on the leg, 3 sc on the chain, 15 sc on the leg, 3 sc on the chain (36)

Round 2:

36 sc

Round 3:

Change yarn color to the green color: 36 sc

Round 4:

36 sc

Round 5:

Change yarn color to the grey color: 36 sc

Round 6-7:

36 sc

Round 8:

Change yarn color to the white color: BLO (5 sc, inc) x 6 (42)

Round 9:

(6 sc, inc) x 6 (48)

Round 10:

(7 sc, inc) x 6 (54)

Round 11:

Change yarn color to the green color: 54 sc

Round 12-13:

54 sc

Round 14:

(7 sc, dec) x 6 (48)

Round 15:

(6 sc, dec) x 6 (42)

Round 16:

(5 sc, dec) x 6 (36)

Round 17:

(4 sc, dec) x 6 (30)

Info:

Stuff

Round 18:

30 sc

Round 19:

(3 sc, dec) x 6 (24)

Round 20-21:

24 sc

Info:

Stuff. Leave a long tail for sewing. Sew the head to the body. Embroider emblem with blue and red thread

β€” Hands

Start working with white color:

Round 1:

6 sc in mr

Round 2:

(1 sc, inc) x 3 (9)

Round 3-5:

9 sc

Round 6:

Change yarn color to the purple color: 9 sc

Round 7:

Change yarn color to the white color: 9 sc

Round 8-9:

9 sc

Round 10:

Change yarn color to the green color: 9 sc

Round 11:

9 sc

Round 12:

Change yarn color to the white color: 9 sc

Round 13-14:

9 sc

Round 15:

Change yarn color to the green color: 9 sc

Round 16-17:

9 sc

Info:

Stuff. Sew the hands to the body

Assembly Instructions

  • Sew the purple head detail (hood) onto the main head piece, ensuring it covers the top and back of the head evenly
  • Attach the small purple ears between rounds 16-17 of the head, positioning them 5-6 stitches away from the eyes for proper proportions
  • Embroider the nose using beige or tan yarn in the center below the eyes
  • Create eye details by embroidering white highlights around the safety eyes as shown in the pattern images
  • Sew the completed head to the body, ensuring the neck opening aligns properly with the body opening
  • Attach the hands to the sides of the body at shoulder level, positioning them so they hang naturally at the sides
  • Embroider Buzz's chest emblem using blue and red yarn on the green portion of the body as detailed in the pattern images

Important Notes

  • πŸ’‘Use stitch markers to track your rounds, especially during the numerous color changes throughout the body and limbs
  • πŸ’‘Insert safety eyes between rounds 15-16 before closing the head to ensure proper placement and secure attachment
  • πŸ’‘Maintain consistent tension when changing colors to avoid gaps or loose stitches at transition points
  • πŸ’‘Work BLO (back loops only) rounds carefully as they create important texture and definition between costume sections
  • πŸ’‘Stuff pieces firmly but not too tightly to maintain the proper shape and allow for clean assembly
  • πŸ’‘Pin all pieces in place before sewing to ensure proper positioning and proportions match the character design
  • πŸ’‘Secure all yarn ends carefully, especially at color changes, to prevent unraveling during assembly and use

This delightful Buzz Lightyear amigurumi pattern brings Pixar's beloved Space Ranger to life in adorable crochet form! With detailed instructions for creating his iconic green and white space suit complete with purple hood, grey accents, and signature chest emblem, this pattern combines color work and simple shaping techniques to capture Buzz's heroic charm. The finished piece stands approximately 15-18cm tall, making it perfect for display, play, or gifting to any Toy Story enthusiast. To infinity and beyond with your crochet hook! πŸš€πŸ§Άβœ¨

You ask,

we answer.

FAQs

What size will the finished Buzz Lightyear amigurumi be?

Using the specified hook size (2mm) and yarn, your finished Buzz Lightyear will measure approximately 15-18cm (6-7 inches) tall, making him the perfect size for display or as a huggable toy.

Can I use different yarn colors to customize my Buzz Lightyear?

While the pattern specifies colors to match the original character, you can absolutely use different colors! Just maintain the same yarn weight and hook size for consistent results. Keep in mind that changing colors will create a unique version rather than the traditional Buzz look.

How do I handle all the color changes smoothly?

When changing colors, complete the last stitch of the old color until you have two loops on your hook, then pull through with the new color. Weave in ends as you go or secure them carefully at the end. The BLO rounds help hide color transition points naturally.

Do I need to know how to embroider for this pattern?

Basic embroidery skills are helpful for adding the chest emblem and facial details, but the pattern includes guidance. Simple straight stitches and satin stitches are all you need. You can also look up basic embroidery tutorials online if you're new to this technique.

Can I make the arms and legs poseable?

While the pattern doesn't include wire armature instructions, you can add pipe cleaners or craft wire inside the arms and legs before stuffing to make them poseable. Just be sure to cap the wire ends securely if making this for young children.

What's the best way to attach the purple hood piece to the head?

Pin the hood piece in place first to ensure even positioning, then use whip stitch or mattress stitch with matching purple yarn to sew it securely to the head. Work slowly around the entire edge for a clean, professional finish.

Is this pattern suitable for beginners?

This pattern is rated intermediate due to the multiple color changes, shaping, and assembly required. Beginners with some amigurumi experience should be able to complete it successfully by following the instructions carefully and taking their time with each section.