Crochet Christmas Star Door Hanging Pattern – Poinsettia Holiday Decor
Beginner Friendly
Perfect for those just starting their crochet journey, with clear instructions and simple techniques
Single-Day Project
A satisfying project you can complete in a single afternoon or evening.
Handmade Gift
A beautiful keepsake — free forever. Read online or print at home.
About This Crochet Christmas Star Door Hanging Pattern – Poinsettia Holiday Decor
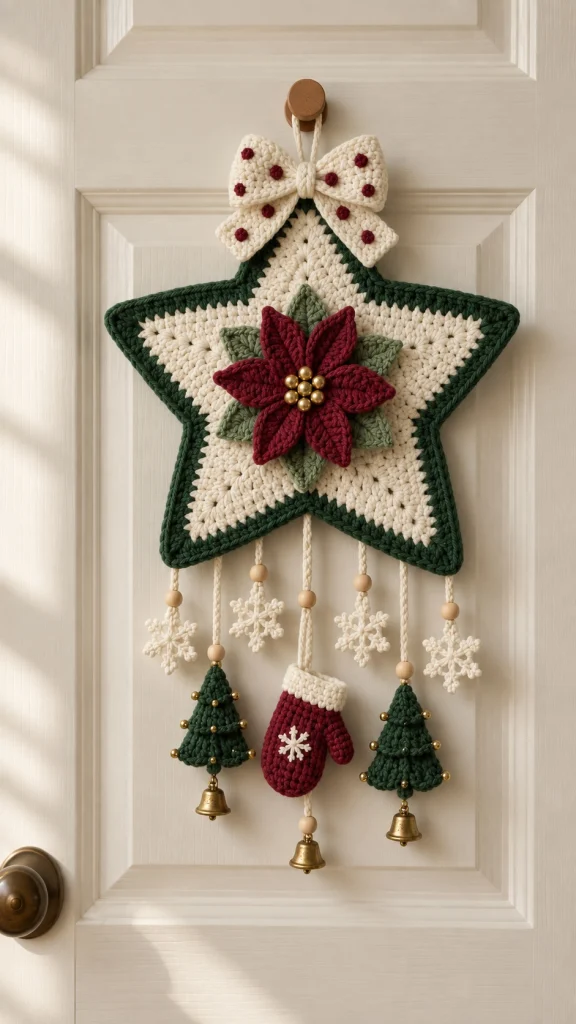
This crochet Christmas star door hanging is a beautiful handmade holiday decoration featuring a large cream and forest-green star, a dimensional burgundy poinsettia, a dotted crochet bow and a collection of dangling Christmas ornaments.
The lower decorations combine delicate snowflakes, miniature Christmas trees, a tiny mitten, wooden beads and small bells for a warm traditional Christmas look.
Materials
- Worsted / Medium #4 cotton yarn – warm cream 180-220 g
- Worsted yarn – dark forest green 120-150 g
- Worsted yarn – burgundy red 80-100 g
- Worsted yarn – sage green 30-40 g
- 4 mm crochet hook 1
- 3 mm crochet hook for snowflakes 1
- Wooden beads, 15-18 mm 8-10
- Small gold beads 15-20
- Small craft bells 3
- Gold beads for poinsettia center 7
- Yarn needle 1
- Scissors 1 pair
- Stitch markers 5
- Optional plastic canvas or stiff felt 1 piece
Abbreviations
MRmagic ringchchainsl stslip stitchscsingle crochethdchalf double crochetdcdouble crochettrtreble crochetdc2togdouble crochet 2 togetherststitchstsstitchesspspaceFOfasten offFinished Size
- Main star: approximately 36-38 cm / 14-15 in wide
- Poinsettia: approximately 15 cm / 6 in
- Bow: approximately 19-21 cm / 7.5-8.25 in wide
- Mini trees: approximately 9-10 cm / 3.5-4 in
- Mitten: approximately 10 cm / 4 in
- Snowflakes: approximately 6-7 cm / 2.4-2.75 in
- Total hanging length: approximately 65-70 cm / 25.5-27.5 in
Construction
The decoration consists of:
- 2 large five-point star panels
- 1 dark green star border
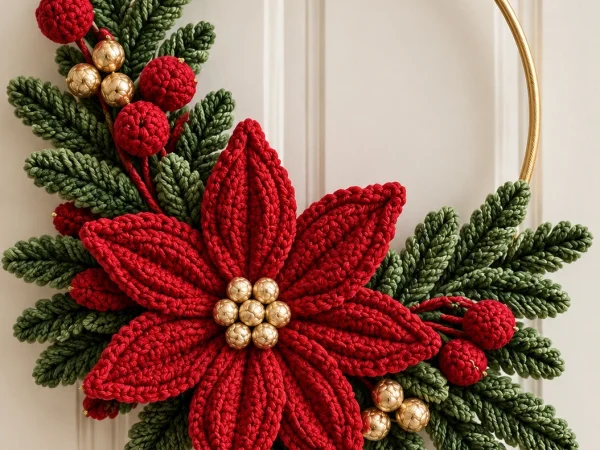
- 1 layered burgundy poinsettia
- 5 sage-green poinsettia leaves
- 1 large cream crochet bow
- burgundy bobble dots for the bow
- 4 crochet snowflakes
- 2 miniature Christmas trees
- 1 miniature Christmas mitten
- wooden beads and hanging cords
- 3 small gold bells
Part 1 – Center of the Large Star
Using warm cream yarn:
R1: MR, ch 3, work 10 dc into ring. Join with sl st. (10 dc)
R2: ch 3, 2 dc in each st around. Join. (20 dc)
R3: ch 3, *dc in next st, 2 dc in next st* around. Join. (30 dc)
R4: ch 3, *dc in next 2 sts, 2 dc in next st* around. Join. (40 dc)
Part 2 – Establish the Five Star Points
Divide the 40 stitches into 5 sections of 8 stitches.
Place a marker after every 8 stitches.
Each section will become one point of the star.
Part 3 – First Star Point
Work back and forth over the first 8 stitches.
Row 1: ch 3, dc across 8 sts. Turn.
Row 2: ch 3, dc2tog, dc across until 2 sts remain, dc2tog. Turn. (6 sts)
Row 3: ch 3, dc across. Turn.
Row 4: dc2tog, dc across until final 2 sts, dc2tog. (4 sts)
Row 5: dc2tog twice. (2 sts)
Row 6: dc2tog. FO.
Part 4 – Complete All Five Points
Rejoin cream yarn at the next marked section.
Repeat the star-point instructions across each group of 8 stitches.
When complete, gently stretch each point into shape.
Part 5 – Green Star Border
Join dark forest green yarn anywhere along the star edge.
Work sc evenly around the entire star.
At each outer point work:
(sc, ch 2, sc) into the tip stitch.
At each inner valley work sc2tog to keep the indentation sharp.
Work a second round of sc for the thick dark-green frame.
Part 6 – Back Star Panel
Make a second star using the same instructions.
The back can be:
- cream with green edging, or
- entirely dark green.
For a firm door decoration, place a star-shaped piece of plastic canvas or stiff felt between the two panels.
Part 7 – Join the Star Panels
Place both star panels wrong sides together.
Using dark green yarn, sc through both layers around the entire edge.
Insert the optional stiffener before closing the final point.
FO and weave in ends.
Part 8 – Burgundy Poinsettia Petals
Make 6 large petals.
Using burgundy yarn, ch 11.
Beginning in second ch from hook:
sl st, sc, hdc, dc, dc, tr, tr, dc, hdc, sc.
Work 3 sc into the final chain.
Continue down the opposite side:
sc, hdc, dc, tr, tr, dc, dc, hdc, sc, sl st.
FO leaving a long sewing tail.
Part 9 – Inner Poinsettia Petals
Make 6 smaller petals.
Ch 8.
Beginning in second ch:
sl st, sc, hdc, dc, tr, dc, hdc.
Work 3 sc into the final chain and mirror the stitches down the opposite side.
FO.
Part 10 – Sage Poinsettia Leaves
Make 5 leaves using sage green yarn.
Ch 10.
Beginning in second ch:
sl st, sc, hdc, dc, tr, tr, dc, hdc, sc.
Work 3 sc into final ch.
Mirror the stitches along the opposite side.
FO leaving a sewing tail.
Part 11 – Assemble the Poinsettia
- Arrange the 5 sage leaves in a circle.
- Layer the 6 large burgundy petals over the leaves.
- Place the 6 smaller petals slightly offset above them.
- Sew firmly through the center.
- Add 7 small gold beads to the flower center.
The petals should remain slightly raised rather than completely flat.
Part 12 – Attach the Poinsettia
Center the finished flower over the middle of the star.
Sew through the back of the flower and the front star panel only.
Add several secure stitches around the flower center and beneath the lower petals.
Part 13 – Crochet Bow
Using cream yarn, ch 26.
Row 1: sc in second ch and across. Turn.
Rows 2-10: ch 1, sc across. Turn.
FO.
Make a second identical rectangle.
Fold each rectangle into a soft bow loop and sew the inner edges together.
Part 14 – Bow Tails
Make 2.
Ch 24.
Work 5 rows of sc.
For the pointed lower edge, decrease one stitch at both ends of the final two rows.
FO.
Place both tails behind the bow loops.
Part 15 – Bow Center
Ch 8.
Work 5 rows of sc.
Wrap this small rectangle tightly around the middle of the bow.
Sew securely at the back.
Part 16 – Burgundy Dots on the Bow
Using burgundy yarn, make approximately 12-14 tiny bobbles.
For each dot:
MR, 6 sc into ring, pull tightly closed and FO.
Sew the dots randomly across the bow loops and tails.
Part 17 – Hanging Loop
Using cream yarn, ch approximately 30-35.
Sl st back through each chain for a firm cord.
Fold the cord in half and sew both ends securely behind the top point of the star.
Attach the bow over the hanging-loop connection to conceal it.
Part 18 – Crochet Snowflakes
Make 4 snowflakes using cream yarn and the 3 mm hook.
R1: MR, *ch 3, sc into ring* 6 times. Join.
R2: sl st into first ch-3 sp, then work:
*ch 5, sl st in second ch from hook, ch 3, sl st in same base ch, ch 2, sl st in next ch, ch 2, sl st in same ch, sl st down remaining chains, sc into next ch-3 sp*
Repeat around to form 6 snowflake arms.
FO and block firmly.
Part 19 – Mini Christmas Tree
Make 2 trees using dark green yarn.
R1: MR, 6 sc.
R2: 2 sc in each st. (12)
R3: BLO sc around.
R4: *sc, 2 sc in next st* around.
R5: BLO sc around.
Continue increasing every second round until the tree has approximately 24-28 sts.
Finish with a scalloped round:
*sl st, 3 dc in next st, sl st* around.
Part 20 – Tree Layers
To create the layered branch effect, join yarn into the unused front loops from the BLO rounds.
Work:
*sl st, hdc, 2 dc in next st, hdc, sl st*
around each exposed loop round.
This creates several overlapping tiers of crochet branches.
Part 21 – Decorate the Mini Trees
Sew approximately 6-8 tiny gold beads across each tree.
Attach one small gold bell to the bottom of each tree.
Part 22 – Mini Christmas Mitten
Using burgundy yarn:
R1: MR, 6 sc.
R2: 2 sc in each st. (12)
R3-R7: sc around.
For thumb:
R8: sc in next 4 sts, ch 4, skip 2 sts, sc around.
R9-R12: sc around.
Change to cream yarn.
R13-R15: sc around.
FO.
Part 23 – Mitten Thumb
Join burgundy yarn around the thumb opening.
Work 8 sc evenly around.
Work 3 rounds of sc.
Final round: sc2tog around.
Pull closed and FO.
Sew a small cream snowflake motif onto the front of the mitten if desired.
Part 24 – Prepare the Hanging Cords
Cut or crochet 7 cream cords in slightly different lengths.
Suggested lengths:
- 20 cm
- 25 cm
- 22 cm
- 31 cm
- 23 cm
- 27 cm
- 21 cm
The uneven lengths create the cascading appearance.
Part 25 – Add Wooden Beads
Thread one natural wooden bead onto most hanging cords.
Secure each bead with a small knot immediately underneath.
Keep the beads approximately 3-6 cm below the star.
Part 26 – Arrange the Hanging Decorations
For a balanced arrangement, use:
- far left – snowflake
- left center – mini Christmas tree + bell
- middle left – snowflake
- center – burgundy mitten + bell
- middle right – snowflake
- right center – mini Christmas tree + bell
- far right – snowflake
Part 27 – Attach the Cords to the Star
Sew each cord securely along the two lower star edges.
Space the cords approximately 4-5 cm apart.
Use several passes of yarn through the star backing so the heavier trees and bells cannot pull free.
Part 28 – Add the Bells
Attach one small gold bell beneath each Christmas tree.
Attach the third bell beneath the center mitten.
Use strong sewing thread or doubled yarn rather than a single strand.
Part 29 – Final Shaping
- Lay the decoration flat.
- Shape all five star points.
- Arrange the poinsettia petals.
- Straighten the bow tails.
- Block the snowflakes separately.
- Adjust all hanging cords.
- Make sure the trees face forward.
- Check that every bead and bell is securely attached.
Optional Stiffening
If the star will hang on a door, additional structure is helpful.
Cut plastic canvas or firm felt approximately 1 cm smaller than the finished star.
Place it between the front and back panels before joining them.
This keeps the points crisp and prevents the weight of the hanging decorations from folding the star.
Color Variations
- Classic: cream + forest green + burgundy + gold
- Vintage Christmas: oatmeal + sage + dusty red + antique gold
- Nordic: white + deep red + natural wood
- Woodland: beige + olive + rust + brown
- Elegant: ivory + dark green + champagne gold
- Candy Christmas: white + red + soft pink + green
Finishing Checklist
- Crochet two large star panels.
- Add the dark green border.
- Insert optional stiffening.
- Join the star panels.
- Make the burgundy poinsettia petals.
- Make the sage leaves.
- Assemble and attach the poinsettia.
- Crochet the cream bow.
- Add burgundy dots to the bow.
- Attach the hanging loop.
- Make four snowflakes.
- Make two miniature Christmas trees.
- Add gold beads and bells to the trees.
- Make the burgundy mitten.
- Prepare seven hanging cords.
- Add wooden beads.
- Attach all dangling decorations.
- Weave in all yarn ends.
- Block and shape the finished decoration.
Frequently Asked Questions
Cotton or a cotton-rich yarn is ideal because it gives the star, bow, poinsettia and miniature ornaments enough structure to hold their shapes.
Make two star panels and place plastic canvas or stiff felt between them. This is particularly helpful because the hanging trees, mitten and bells add weight to the bottom.
Yes. Crochet small bell shapes instead, or simply finish the trees and mitten with wooden beads.
Yes. Use DK yarn with a 3-3.5 mm hook and reduce the number of center rounds before forming the star points.
Yes. The same piece works well on an interior wall, above a fireplace, on a cabinet door or as part of a Christmas display.
Remove any detachable bells if necessary, lay the decoration flat between sheets of tissue paper and store it in a dry box rather than folding the star.
The finished Crochet Christmas Star Door Hanging Pattern – Poinsettia Holiday Decor