Crochet Pink Daisy Granny Square Tote Bag – Free Floral Handbag Pattern
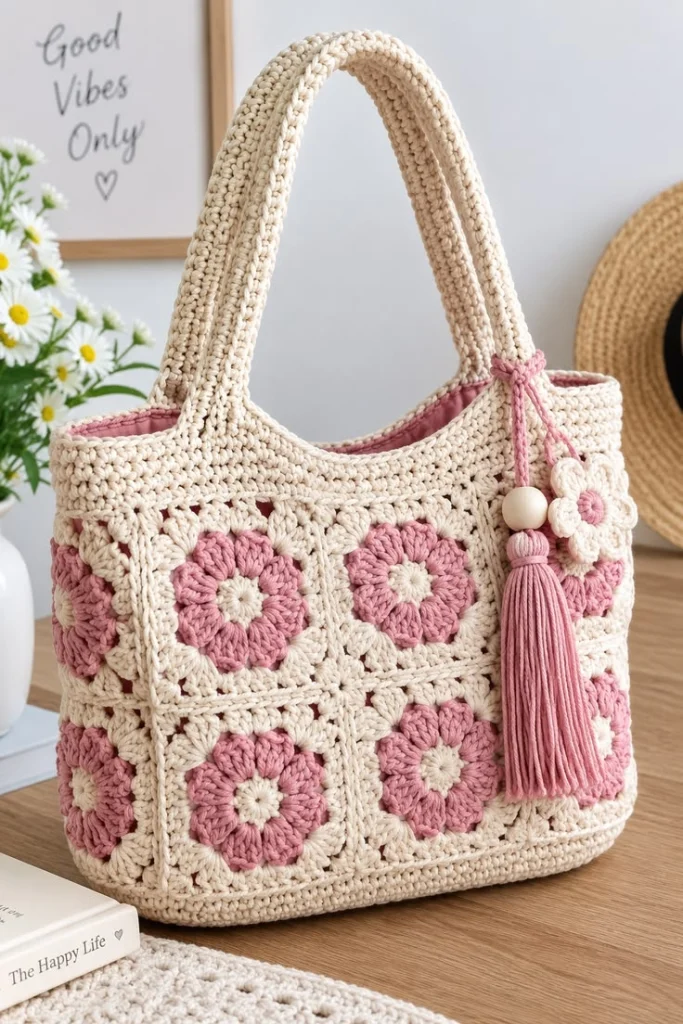
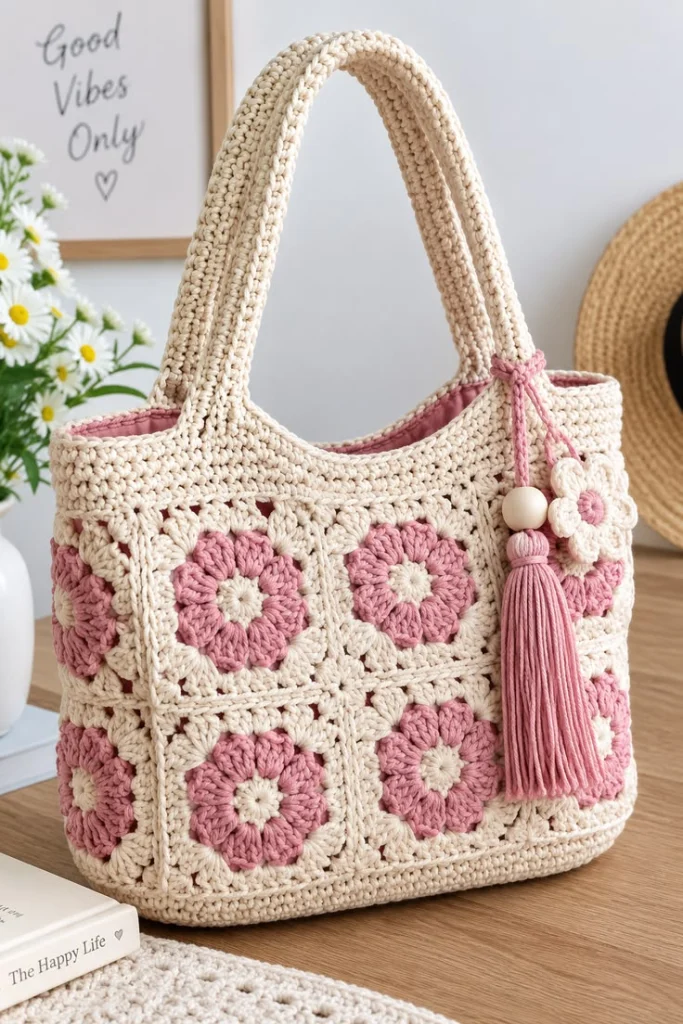
Create a charming handmade accessory with this crochet pink daisy granny square tote bag. Featuring soft dusty-pink flowers, creamy ivory granny squares, thick crocheted shoulder straps, and a delicate pink tassel, this beautiful floral handbag combines vintage crochet charm with everyday practicality.
The bag features raised pink daisy motifs with cream centers, arranged in neat rows and joined with textured ivory borders. A sturdy crocheted base provides structure, while the wide shoulder handles make it comfortable to carry. The matching tassel and small flower charm add a sweet finishing touch.
This free crochet pattern walks you through creating the floral squares, joining the panels, constructing the bag, crocheting reinforced handles, and making the decorative tassel.
Pattern Information
- Skill Level: Intermediate
- Finished Width: Approximately 34–38 cm
- Finished Height: Approximately 28–32 cm, excluding handles
- Base Depth: Approximately 10–12 cm
- Handle Drop: Approximately 24–28 cm
- Hook Size: 4 mm or 4.5 mm
- Yarn Weight: Worsted-weight cotton or cotton blend
- Terminology: US crochet terms
Measurements are approximate and depend on yarn thickness, crochet tension, and the size of the granny squares.
Materials Needed
- 400–500 g cream or ivory cotton yarn
- 180–250 g dusty-pink cotton yarn
- Small amount of additional cream yarn for flower centers
- 4 mm or 4.5 mm crochet hook
- Yarn needle
- Scissors
- Stitch markers
- Measuring tape
- Optional cotton fabric lining
- Optional magnetic snap closure
- One large wooden bead for the tassel
- Optional small wooden ring for the flower charm
Crochet Abbreviations
- MR: Magic ring
- ch: Chain
- sc: Single crochet
- hdc: Half double crochet
- dc: Double crochet
- tr: Treble crochet
- sl st: Slip stitch
- sp: Space
- st: Stitch
- inc: Increase
- FO: Fasten off
Part 1: Crochet the Pink Daisy Granny Squares
The raised daisy granny squares are the main decorative feature of this handbag.
For a medium-sized tote, make approximately 12 floral squares: six for the front and six for the back, arranged in two rows of three.
Aim for squares measuring approximately 10–11 cm after blocking. Adjust the number of rounds or the yarn thickness to achieve the desired size.
Round 1: Cream Flower Center
Using cream yarn:
- Make a magic ring.
- Ch 3 (counts as first dc).
- Work 11 dc into the ring.
- Pull the ring closed.
- Sl st into the top of the beginning ch 3.
- FO. (12 dc)
Round 2: Pink Daisy Petals
Join dusty-pink yarn into any stitch.
- Ch 3.
- Work 3 dc into the same stitch, leaving the final loop of each dc on the hook.
- Yarn over and pull through all loops to complete a petal cluster.
- Ch 2.
- Repeat one petal cluster in each remaining stitch.
- Sl st to join.
You should have 12 raised pink petal clusters separated by chain spaces.
Round 3: Shape the Floral Motif
Continue with dusty-pink yarn.
- Sl st into the next ch-2 space.
- Ch 3.
- Work 2 dc into the same space.
- Ch 1.
- Work 3 dc into each remaining ch-2 space, with ch 1 between groups.
- Sl st to join.
- FO.
The flower should now have a full, textured appearance with a cream center and pink petals.
Part 2: Turn the Flower Into a Square
Using cream yarn, transform the round flower into a granny square.
Round 4: Establish the Corners
- Join cream yarn into any ch-1 space.
- Ch 3, work 2 dc, ch 2, and 3 dc into the same space to form the first corner.
- Work 3 dc into each of the next two ch-1 spaces.
- In the next ch-1 space, work (3 dc, ch 2, 3 dc) for the second corner.
- Repeat this sequence around the flower.
- Sl st to join.
The four corners should be evenly spaced, creating a square outline around the flower.
Round 5: Cream Granny Square Border
- Ch 3.
- Work dc stitches along the side.
- At each corner, work (2 dc, ch 2, 2 dc).
- Continue around all four sides.
- Sl st to join.
Round 6: Textured Outer Border
- Ch 1.
- Sc into each stitch along the sides.
- Work (sc, ch 2, sc) in each corner space.
- Sl st to join.
- FO and weave in the ends.
Repeat until you have 12 matching daisy granny squares.
Part 3: Block the Granny Squares
Blocking helps the floral squares maintain a consistent shape and makes joining easier.
- Lightly dampen each square.
- Lay it flat on a blocking mat.
- Pin the four corners into a neat square.
- Adjust the sides so the measurements match.
- Allow the squares to dry completely.
All 12 squares should be approximately the same size before assembly.
Part 4: Join the Front and Back Panels
Arrange six squares for the front panel in two rows of three.
Repeat with the remaining six squares for the back panel.
Joining Instructions
- Place two squares with wrong sides together.
- Using cream yarn, insert the hook through corresponding edge stitches.
- Join the squares using single crochet.
- Continue across the entire shared edge.
- Join the third square to complete the first row.
- Repeat for the second row.
- Join both rows together using the same technique.
The raised single-crochet seams create the decorative cream lines between the pink floral squares.
Make two identical panels.
Part 5: Crochet the Side Panels
The bag has a structured shape with narrow side sections.
Using cream yarn:
- Ch 19.
- Sc in the second chain from the hook and across. (18)
- Ch 1, turn.
- Sc across each row.
- Repeat until the panel matches the height of the front and back panels.
- FO, leaving a long sewing tail.
Make two side panels.
For a slightly more decorative finish, alternate rows of single crochet and half double crochet.
Part 6: Crochet the Sturdy Bag Base
The base should be firm enough to support the contents of the handbag.
Using cream cotton yarn and a 4 mm hook:
- Make a foundation chain approximately equal to the width of the bag.
- Sc in the second chain from the hook and across.
- Ch 1, turn.
- Sc across.
- Continue until the base measures approximately 10–12 cm deep.
- FO, leaving a long sewing tail.
For additional durability, work the base using a smaller hook or hold two strands of cotton yarn together.
Part 7: Assemble the Tote Bag
- Lay the front panel flat with the right side facing outward.
- Attach one side panel to each vertical edge.
- Join the back panel to the opposite edges of the side panels.
- Position the rectangular base beneath the assembled body.
- Use single crochet to join the bottom edges to the base.
- Reinforce the four bottom corners with additional stitches.
- Turn the bag right side out.
Check that the floral motifs face outward and the seams are evenly aligned.
Part 8: Crochet the Upper Rim
The bag features a firm cream-colored upper band that helps maintain its shape.
Join cream yarn to the upper opening.
- Round 1: Sc evenly around the opening.
- Round 2: Hdc in each stitch.
- Rounds 3–5: Sc in each stitch.
- Round 6: Work reverse single crochet around the opening for a decorative edge.
- FO and weave in the ends.
Maintain even tension so the upper rim does not flare or pull inward.
Part 9: Crochet the Thick Shoulder Handles
The handbag features two wide, sturdy crocheted handles.
Using cream yarn:
Handle Instructions
- Ch 11.
- Sc in the second chain from the hook and across. (10)
- Ch 1, turn.
- Sc across.
- Repeat until the handle measures approximately 55–65 cm long.
- FO, leaving a long sewing tail.
Make two handles.
Reinforce the Handles
For a thicker and more durable handle:
- Fold each handle lengthwise.
- Join the long edges using slip stitches or single crochet.
- Alternatively, crochet a second matching strip and join the two layers together.
- Insert a cotton cord inside if additional structure is desired.
Attach the Handles
- Position the first handle on the front of the bag.
- Keep both attachment points evenly spaced from the side seams.
- Sew each end securely to the upper band.
- Repeat with the second handle on the back.
- Reinforce the attachment areas with several rows of stitching.
The handles should form smooth, rounded arches above the bag.
Part 10: Make the Pink Tassel
The dusty-pink tassel adds movement and a playful decorative detail.
Tassel Instructions
- Cut approximately 35–45 strands of pink yarn, each around 25–30 cm long.
- Fold the strands in half.
- Tie a separate strand tightly around the folded center.
- Wrap another strand around the upper section to form the tassel head.
- Secure the wrap with a knot.
- Trim the lower ends evenly.
Thread the hanging cord through a large wooden bead before attaching the tassel to the bag.
Part 11: Crochet the Small Flower Charm
Make a small cream flower with a pink center to decorate the tassel attachment.
Flower Center
Using pink yarn:
- MR, 10 sc.
- Sl st to join.
- FO.
Flower Petals
Join cream yarn.
- Ch 2.
- Work 3 dc into the same stitch.
- Ch 2 and sl st into the next stitch.
- Repeat to create five rounded petals.
- FO and weave in the ends.
Attach the flower to a small wooden ring or crocheted loop, then connect it to the tassel cord.
Part 12: Add an Optional Fabric Lining
A lining helps protect the crochet stitches and prevents small objects from slipping through the decorative openings.
- Measure the interior of the completed bag.
- Cut cotton fabric pieces for the front, back, sides, and base, allowing for seam allowances.
- Sew the pieces together to form a fabric bag.
- Fold the upper edge inward for a clean finish.
- Insert the lining into the crochet bag.
- Hand-stitch it securely around the upper rim.
You may also add a small interior pocket or magnetic snap closure.
Part 13: Final Finishing
- Weave in all loose yarn ends.
- Check that every granny square is securely joined.
- Reinforce the handle attachment points.
- Shape the upper rim with your hands.
- Adjust the tassel length.
- Position the flower charm neatly beside the handle.
- Lightly steam-block the bag if appropriate for your yarn.
- Allow the bag to dry completely before use.
Your handmade pink daisy granny square tote bag is now ready to carry!
Beautiful Color Variations
Classic Pink and Cream
Use dusty-pink petals, ivory centers, and cream borders for the soft romantic look shown in the design.
Lavender Daisy Tote
Combine lavender petals with white centers and pale-purple borders.
Sunflower Tote Bag
Use golden-yellow petals, dark-brown centers, and cream or sage-green borders.
Vintage Rose Tote
Try muted rose, warm beige, and soft taupe for an elegant vintage-inspired accessory.
Spring Garden Tote
Alternate pink, peach, yellow, and lilac flowers while keeping the borders cream.
Helpful Crochet Tips
- Choose cotton yarn for better stitch definition and durability.
- Keep the flower petals evenly spaced for consistent granny squares.
- Block all squares before joining them.
- Use a smaller hook for the base to create a firmer fabric.
- Reinforce the handles carefully because they carry the weight of the bag.
- Use a lining if you plan to carry keys, pens, or other small items.
- Keep the tassel removable if you want easier washing.
- Avoid overloading the bag to prevent stretching.
Frequently Asked Questions
Is this crochet daisy tote bag suitable for beginners?
Confident beginners who already know basic crochet stitches can attempt the floral squares. However, assembling the bag and reinforcing the handles require some additional experience.
What yarn works best for a crochet handbag?
Cotton yarn is an excellent choice because it provides good stitch definition, holds its shape relatively well, and is suitable for everyday accessories.
Can I make the bag larger?
Yes. Add more granny squares to the front and back panels, increase the side-panel width, and adjust the base dimensions accordingly.
Can I use different flower colors?
Absolutely. The granny square design works beautifully with many color combinations, including lavender, yellow, peach, coral, and sage green.
Does the bag need a lining?
A lining is optional, but it is recommended for regular use because the decorative granny squares contain small openings.
How can I prevent the handles from stretching?
Use firm cotton yarn, reinforce the handle strips, and consider inserting a strong cotton cord inside each handle.
Care Instructions
- Hand wash gently in cool water.
- Use a mild detergent suitable for cotton yarn.
- Avoid twisting or wringing the bag.
- Gently press out excess water with a towel.
- Reshape the bag while damp.
- Lay flat to dry completely.
- Remove the tassel before washing if possible.
Final Thoughts
This crochet pink daisy granny square tote bag is a beautiful combination of floral crochet motifs, practical handbag construction, and delicate handmade details.
With its soft pink daisies, textured cream borders, sturdy shoulder handles, and matching tassel charm, it makes a lovely everyday accessory, a thoughtful handmade gift, or a special addition to your crochet collection.
Whether you choose the classic pink-and-cream palette or experiment with your own favorite colors, this free floral crochet handbag pattern offers plenty of opportunities for creativity.
Love this crochet bag? Save the pattern to Pinterest and share it with your crochet friends for more beautiful handmade inspiration!