Crochet Pumpkin Door Hanger Pattern
Beginner Friendly
Perfect for those just starting their crochet journey, with clear instructions and simple techniques
Single-Day Project
A satisfying project you can complete in a single afternoon or evening.
Handmade Gift
A beautiful keepsake — free forever. Read online or print at home.
About This Crochet Pumpkin Door Hanger Pattern
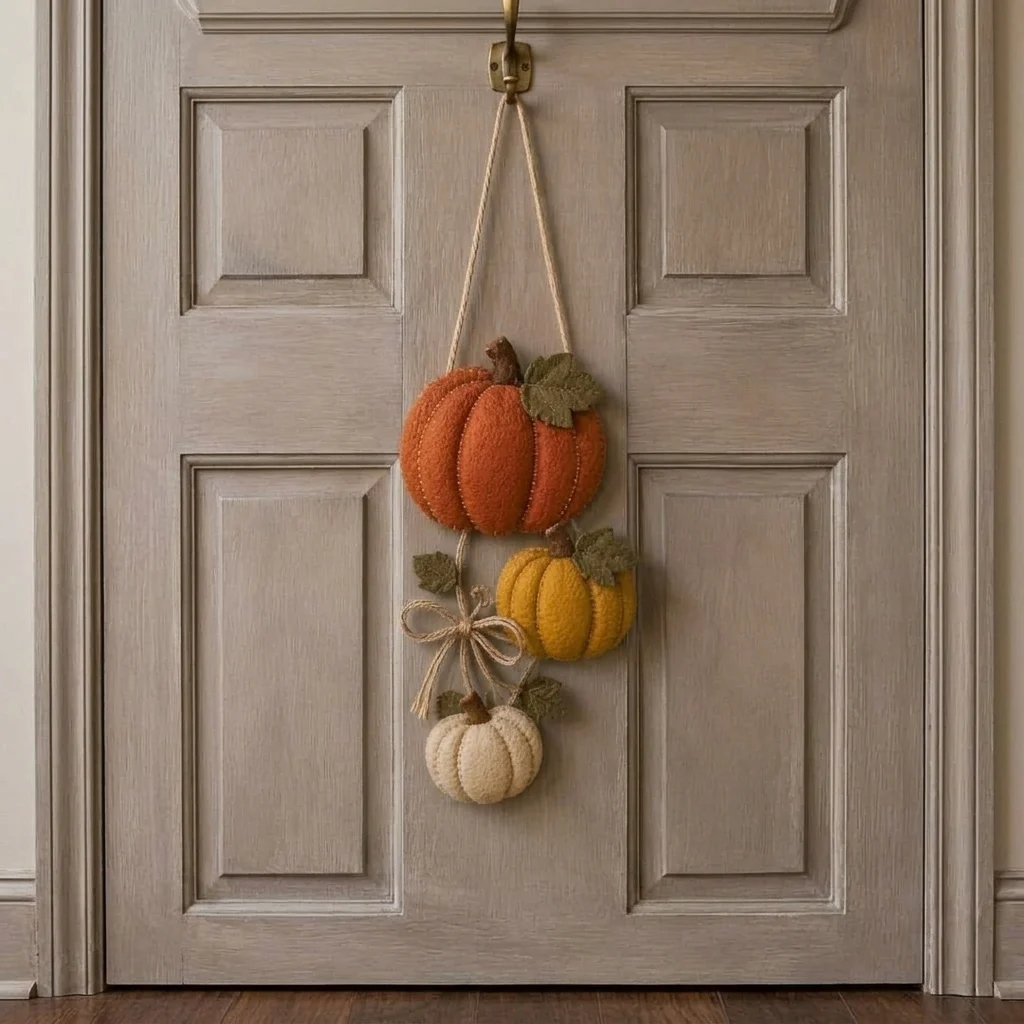
This crochet pumpkin door hanger pattern creates a simple and cozy autumn decoration with three softly stuffed pumpkins hanging vertically from a rustic cord. The pumpkins are made in three different sizes and warm fall shades: burnt orange, golden mustard and creamy ivory.
Each pumpkin is crocheted as a textured rectangle, joined into a tube, stuffed and shaped into a pumpkin. Small crochet leaves, brown stems and a natural-looking bow complete the farmhouse-inspired design.
Materials
- Worsted #4 yarn in burnt orange 100 g
- Worsted #4 yarn in mustard gold 70 g
- Worsted #4 yarn in cream 50 g
- Worsted #4 yarn in olive green 30 g
- Worsted #4 yarn in dark brown small amount
- 4.0 mm crochet hook 1
- Polyester fiberfill small bag
- Natural jute cord or sturdy yarn 1.5-2 m
- Yarn needle 1
- Scissors 1 pair
- Stitch markers optional
Abbreviations
chchainsl stslip stitchscsingle crochethdchalf double crochetdcdouble crochetBLOback loop onlyststitchFOfasten offFinished Measurements
- Large orange pumpkin: approximately 16 cm / 6.3 in wide
- Medium mustard pumpkin: approximately 12 cm / 4.7 in wide
- Small cream pumpkin: approximately 9 cm / 3.5 in wide
- Complete hanging: approximately 45-55 cm / 18-22 in long
Large Burnt Orange Pumpkin
Using burnt orange yarn, ch 31.
R1: Hdc in 2nd ch from hook and in each ch across. Turn. (30)
R2: Ch 1, hdc BLO in each st across. Turn. (30)
R3-R34: Repeat R2.
The rectangle should have strong vertical ridges.
Fold the rectangle so the first and last rows meet.
Sl st through both layers across to form a tube.
FO, leaving a long tail.
Closing and Stuffing the Pumpkin
- Thread the long yarn tail onto a yarn needle.
- Weave through the stitches around one open edge.
- Pull firmly to gather the opening closed.
- Secure with several stitches.
- Turn the pumpkin right side out.
- Add fiberfill until the pumpkin is soft but holds its shape.
- Thread yarn around the second opening.
- Pull closed and secure.
Shaping the Pumpkin
Cut a long strand of matching orange yarn.
Insert the needle through the center of the pumpkin from top to bottom.
Wrap the yarn around the outside and pull gently to create the first pumpkin section.
Pass the needle through the center again.
Repeat until you have 6 evenly spaced sections.
Secure the yarn underneath the pumpkin and weave in the end.
Medium Mustard Pumpkin
Using mustard yarn, ch 25.
R1: Hdc in 2nd ch from hook and across. Turn. (24)
R2: Ch 1, hdc BLO across. Turn.
R3-R28: Repeat R2.
Join the short edges to form a tube.
Gather the bottom, stuff lightly and gather the top.
Shape into 6 sections using the same method as the large pumpkin.
Small Cream Pumpkin
Using cream yarn, ch 19.
R1: Hdc in 2nd ch from hook and across. Turn. (18)
R2: Ch 1, hdc BLO across. Turn.
R3-R22: Repeat R2.
Join into a tube, gather one side, stuff and close the second side.
Shape into 6 sections.
Crochet Pumpkin Stems
Make 3 stems.
Using dark brown yarn:
R1: Ch 7.
R2: Sc in 2nd ch from hook and across. Turn. (6)
R3-R5: Ch 1, sc BLO across.
FO leaving a sewing tail.
Roll the small rectangle tightly into a stem shape.
Sew through the layers so the roll stays secure.
Attach one stem firmly to the center top of each pumpkin.
Small Crochet Leaves
Using olive green yarn, ch 8.
Beginning in the 2nd ch from hook:
Side 1: sl st, sc, hdc, dc, dc, hdc, 3 sc in last ch.
Continue along the opposite side of the foundation chain.
Side 2: hdc, dc, dc, hdc, sc, sl st.
Join and FO, leaving a sewing tail.
Make approximately 5-6 leaves in slightly different sizes.
Larger Leaf
For a larger leaf, ch 11.
Beginning in the 2nd ch:
Sl st, sc, hdc, dc, dc, tr, dc, dc, hdc, sc.
Work 3 sc into the final chain.
Repeat the stitch sequence along the opposite side.
Sl st to finish.
Preparing the Hanging Cord
Cut approximately 120-140 cm of sturdy jute cord.
Fold the cord in half.
Create a loop approximately 12-15 cm long at the top for hanging over a door hook.
Tie a secure knot directly below the loop.
The remaining two cord strands will run vertically through the pumpkin arrangement.
Attaching the Large Pumpkin
Position the large orange pumpkin approximately 12-15 cm below the hanging loop.
Pass the cord behind the pumpkin.
Using matching orange yarn, sew the pumpkin securely to the cord at several points.
Make sure the pumpkin remains centered.
Add one or two olive leaves beside the stem.
Attaching the Medium Pumpkin
Position the mustard pumpkin approximately 4-5 cm below the large pumpkin.
Offset it slightly to one side for the relaxed cascading look.
Sew securely to the hanging cord.
Add one small leaf beside the stem.
Attaching the Small Pumpkin
Position the cream pumpkin approximately 5-6 cm below the mustard pumpkin.
Place it slightly toward the opposite side to create visual balance.
Sew securely through the back of the pumpkin and around the cord.
Add a small olive leaf near its stem.
Rustic Center Bow
Cut approximately 70 cm of jute cord.
Tie a relaxed bow between the large and medium pumpkins.
Keep the loops approximately 6-7 cm wide.
Allow the two tails to hang naturally.
Trim the tails evenly or leave them slightly uneven for a rustic finish.
Final Assembly
- Lay the complete hanger flat.
- Check that all three pumpkins face forward.
- Adjust the large pumpkin so it remains the main focal point.
- Angle the medium pumpkin slightly toward one side.
- Center the small cream pumpkin underneath.
- Sew any loose leaves into position.
- Check every attachment point before hanging.
- Trim loose fibers from the jute cord.
Frequently Asked Questions
Yes. Add stitches to the starting chain for height and work additional rows for width. Keep the rectangle slightly wider than it is tall so the finished pumpkin stays plump.
Yes. Cotton produces defined stitches and firmer pumpkins. Acrylic or a soft wool blend will create a slightly softer, more plush result.
It is best used on a protected porch or interior door. Yarn and fiberfill can absorb moisture if exposed directly to rain.
Sew each pumpkin to the hanging cord at two or three points across the back instead of attaching it at only one point.
Yes. A crocheted cord works beautifully. You can also use cotton rope or several strands of matching yarn braided together.
Yes. Try rust, sage and cream for a softer look, or burgundy, mustard and oatmeal for a deeper late-autumn palette.
The finished Crochet Pumpkin Door Hanger Pattern

