Vintage Brown & Cream Crochet Rug Pattern
Beginner Friendly
Perfect for those just starting their crochet journey, with clear instructions and simple techniques
Single-Day Project
A satisfying project you can complete in a single afternoon or evening.
Handmade Gift
A beautiful keepsake — free forever. Read online or print at home.
About This Vintage Brown & Cream Crochet Rug Pattern
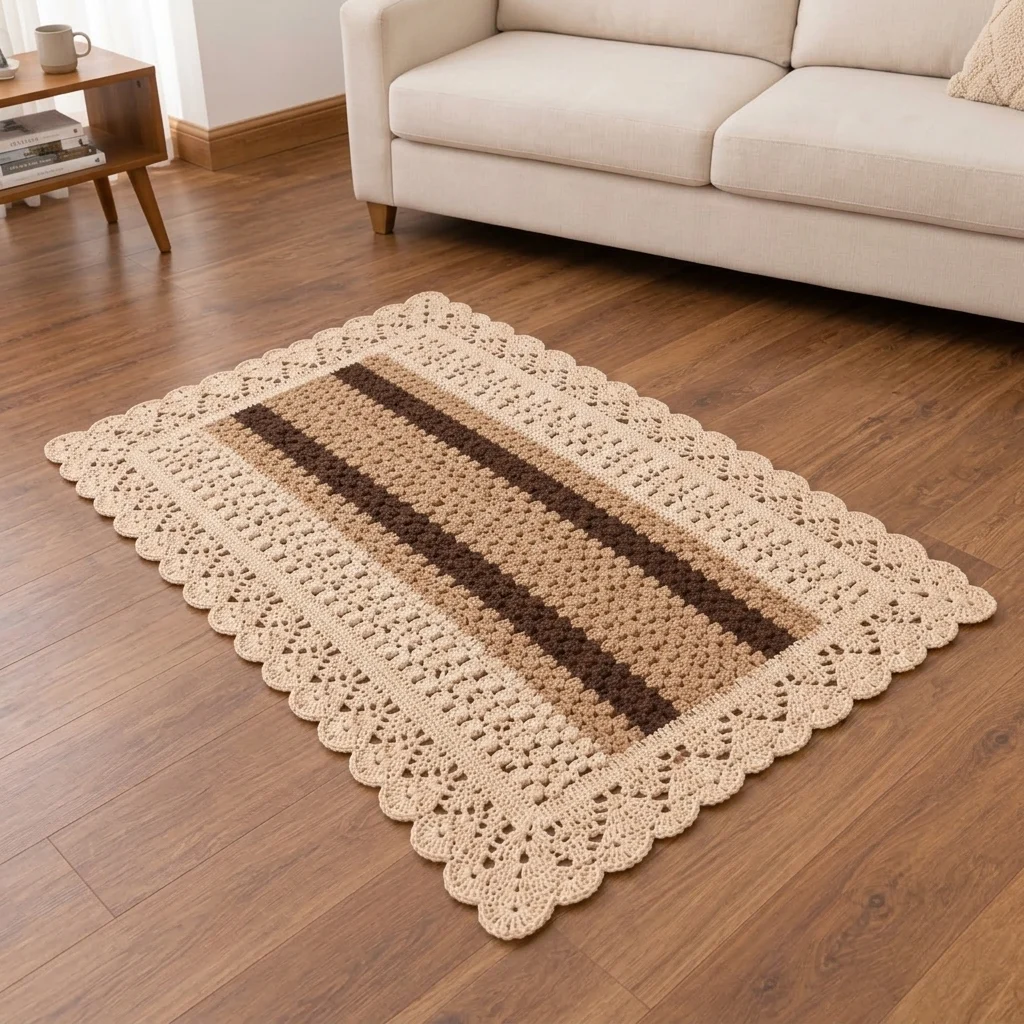
This brown and cream crochet rug pattern recreates the warm, elegant look of the reference: a rectangular center worked in neutral stripes, surrounded by a wide cream decorative border and finished with beautiful scalloped lace edges.
The combination of cream, warm beige and chocolate brown makes this rug especially pretty in cozy neutral interiors. It works beautifully beside a sofa, at the foot of a bed, in an entryway or anywhere you want to add a soft handmade detail.
Materials
- Bulky cotton yarn – cream 700-850 g
- Bulky cotton yarn – warm beige 450-550 g
- Bulky cotton yarn – chocolate brown 300-400 g
- 6 mm crochet hook 1
- Yarn needle 1
- Scissors 1 pair
- Stitch markers 4
- Non-slip rug backing optional
Abbreviations
chchainsl stslip stitchscsingle crochethdchalf double crochetdcdouble crochettrtreble crochetskskipspspaceststitchFOfasten offFinished Size
Approximately 100 × 70 cm / 39 × 27.5 inches.
The striped center measures approximately 70 × 40 cm / 27.5 × 16 inches, with the wide cream border adding approximately 15 cm / 6 inches around each side.
Construction
The rug begins with a rectangular striped center worked back and forth in rows.
After completing the center panel, cream yarn is attached and worked around all four sides. Several structured rounds create the inner frame, followed by open lace rounds and a wide scalloped shell border.
This construction makes it easy to adjust the final size.
Striped Center Panel
Using warm beige yarn, ch 71.
R1: Hdc in second ch from hook and in every chain across. (70 sts)
R2: Ch 1, turn. Hdc in every stitch across.
R3: Ch 1, turn. *Sc in next st, dc in next st.* Repeat across.
R4: Repeat R3, working sc into each dc and dc into each sc.
This creates the softly textured center visible in the reference.
Stripe Sequence
Continue working the textured stitch pattern while changing colors as follows:
- Warm beige: 10 rows
- Chocolate brown: 5 rows
- Warm beige: 12 rows
- Chocolate brown: 5 rows
- Warm beige: 10 rows
The two chocolate stripes should run lengthwise across the finished rectangular center, separated by a wider beige section.
Fasten off after completing the center.
Prepare the Cream Border
Attach cream yarn to any corner.
Border R1: Ch 1 and sc evenly around the entire rectangle.
Work 3 sc into each corner.
Along the row ends, place stitches evenly so the fabric remains completely flat.
Join with sl st.
Solid Cream Frame
Border R2: Ch 2, hdc in every stitch around. Work 3 hdc into the center corner stitch.
Border R3: Repeat R2.
Border R4: Ch 1, sc around, again increasing at every corner.
This forms the clean cream frame immediately surrounding the striped center.
First Openwork Round
Border R5: Ch 3.
*Dc in next 2 sts, ch 1, skip 1 st.* Repeat along each side.
At each corner work:
2 dc, ch 2, 2 dc into the corner space.
Join with sl st.
Textured Cream Round
Border R6: Ch 1.
Sc in each dc and work 1 sc into each ch-1 space.
At each corner work 3 sc.
Border R7: Ch 2, hdc around.
Work 3 hdc into each corner.
Decorative Lace Round
Border R8: Ch 4.
*Skip 2 sts, dc in next st, ch 2.* Repeat across each side.
At every corner work:
dc, ch 3, dc into the corner stitch.
This creates the small open spaces visible before the outer lace section.
Fan Foundation Round
Border R9: Sl st into the first ch-2 space.
Ch 3.
Work 3 dc into each ch-2 space.
Between groups, ch 1.
At each corner work:
3 dc, ch 2, 3 dc.
Outer Lace Section
Border R10: Ch 1, sc around, placing 1 sc in every dc and 1 sc into every ch-1 space.
Border R11: Ch 4, skip 2 sts, sc in next st.
*Ch 3, skip 2 sts, sc in next st.* Repeat around.
At the corners, work an additional ch-3 loop to allow the lace to turn smoothly.
Large Scalloped Shell Border
This final section creates the wide decorative scallops that give the rug its vintage look.
Border R12: Sl st into the first ch-3 loop.
Into the next loop work:
7 dc.
Sc into the following loop.
Repeat:
*7 dc in next loop, sc in next loop.*
Continue around the rug.
Final Scallop Detail
Border R13: Sl st to the center of the first shell.
Work:
sc, ch 3, sc into the center stitch of each shell.
Then work sc evenly down the remaining shell stitches.
Repeat around.
This adds a delicate pointed detail to each scallop.
Corner Scallops
The corners need slightly larger shells so they remain flat.
At each corner ch-space work:
5 dc, ch 2, 5 dc.
On the following round, work:
sc, ch 3, sc into the corner ch-2 space.
This creates a gently pointed corner similar to the reference.
Finishing
- Fasten off and weave in every yarn end securely.
- Lay the rug completely flat.
- Pin the four corners first.
- Shape each scallop individually.
- Lightly wet or steam block the rug.
- Allow it to dry completely before moving it.
Optional Non-Slip Backing
If the rug will be placed on wood, tile or another smooth floor, adding a non-slip backing is recommended.
You can use a separate rug pad underneath or carefully hand-sew a cut-to-size non-slip mesh backing to the underside.
Color Ideas
- Reference style: cream + camel beige + chocolate brown
- Modern neutral: ivory + taupe + espresso
- Autumn: cream + rust + dark brown
- Farmhouse: natural cotton + oatmeal + mocha
- Soft feminine: ivory + dusty rose + cocoa
- Coastal: cream + sand + muted navy
How to Make a Matching Rug Set
The same construction can be used to create several coordinating rugs.
For a smaller bedside or bathroom mat, begin with approximately 51 chains instead of 71 and reduce the number of center rows.
Keep the same cream lace border so all of the pieces look like a matching handmade set.
How to Make the Rug Larger
Add foundation chains in multiples of 2 to increase the width.
Add additional rows to the striped center to increase the length.
Then work the border exactly as described, adjusting the openwork repeats as necessary along each side.
Frequently Asked Questions
Firm cotton yarn is an excellent choice because it gives good stitch definition, handles regular use well and helps the rug maintain its shape. Bulky cotton or two strands of worsted cotton held together can both work well.
The rectangular center is beginner friendly. The decorative lace border requires more careful stitch counting, so the complete project is best suited to a confident beginner or intermediate crocheter.
Yes. Stop after the solid cream frame for a simpler modern version, or add only the first openwork rounds for a less decorative edge.
Curling usually means there are too few stitches around the border or insufficient increases at the corners. Blocking can correct minor curling, but significant cupping usually requires adjusting the stitch count.
Ruffling usually means there are too many stitches or increases. Reduce the number of stitches in the shells or space the decorative repeats slightly farther apart.
That depends on the yarn used. Check the yarn label first. Cotton rugs can often be washed gently, but laying the rug flat to dry helps preserve the lace shape.
The finished Vintage Brown & Cream Crochet Rug Pattern