Christmas Crochet Star Ornament Pattern
Beginner Friendly
Perfect for those just starting their crochet journey, with clear instructions and simple techniques
Single-Day Project
A satisfying project you can complete in a single afternoon or evening.
Handmade Gift
A beautiful keepsake — free forever. Read online or print at home.
About This Christmas Crochet Star Ornament Pattern
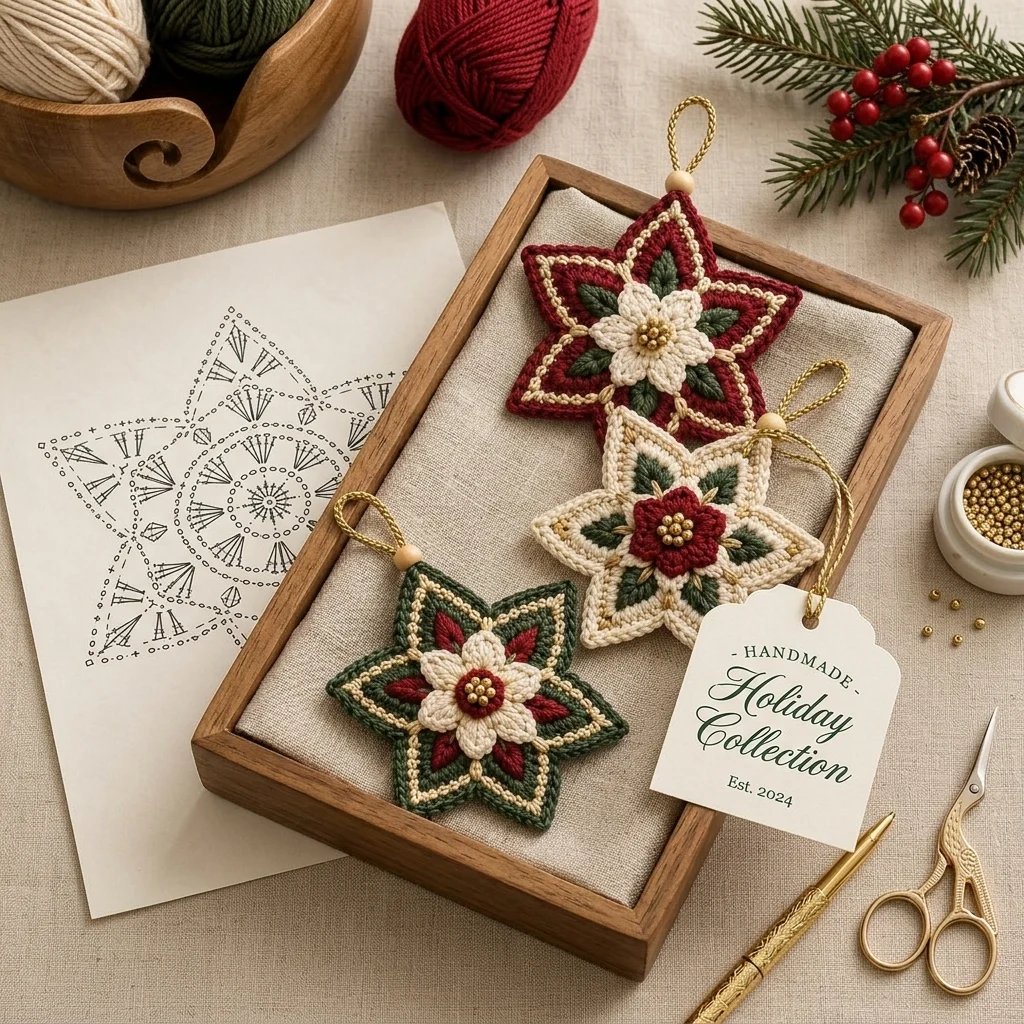
This crochet Christmas star ornament pattern creates a richly textured six-point star inspired by traditional poinsettias. Layers of red, cream and evergreen crochet petals create a dimensional floral center, while contrasting stitches outline each star point.
Make the ornament in classic Christmas red, cream and green, or reverse the main colors to create a coordinated collection for your tree, doors, windows or handmade holiday gifts.
Materials
- DK / Light #3 cotton yarn in Christmas red 25-30 g
- DK / Light #3 cotton yarn in natural cream 25-30 g
- DK / Light #3 cotton yarn in forest green 15-20 g
- Gold embroidery thread or fine metallic yarn small amount
- 3.0 mm crochet hook 1
- Small gold beads 7-10
- Wooden bead for hanging loop 1
- Gold cord 20-25 cm
- Yarn needle 1
- Scissors 1 pair
- Stitch markers optional
Abbreviations
MRmagic ringchchainsl stslip stitchscsingle crochethdchalf double crochetdcdouble crochettrtreble crochetdc2togdouble crochet 2 togetherpicotch 3, sl st into first chststitchspspaceFOfasten offFinished Size
- Star width: approximately 14-16 cm / 5.5-6.25 in
- Star height: approximately 14-16 cm / 5.5-6.25 in
- Hanging loop: approximately 6-7 cm
Star Base – Round 1
Using the main star color, make a MR.
R1: Ch 3, work 11 dc into MR. Pull ring closed and join with sl st to top of beginning ch 3. (12 dc)
Round 2 – Six Sections
R2: Ch 3, dc in same st, ch 2, skip next st.
*2 dc in next st, ch 2, skip next st.* Repeat around.
Join with sl st. You should have 6 ch-2 spaces.
Round 3 – Beginning the Star Points
Sl st into first ch-2 space.
R3: In each ch-2 space work:
(2 dc, ch 2, 2 dc).
Ch 1 between groups.
Repeat around and join.
Round 4 – Building the Points
Sl st to first ch-2 corner space.
Into each corner work:
(2 dc, ch 2, 2 dc).
Work 2 dc into the ch-1 space between points.
Repeat around.
Round 5 – Extending Each Point
Work toward the first corner.
Along each side of a point work:
sc, hdc, dc, tr.
At the tip work:
(tr, ch 2, tr).
Down the opposite side work:
tr, dc, hdc, sc.
Sl st into the valley between points.
Repeat for all six points.
Round 6 – Defined Star Edge
Using a contrasting color, join yarn in any valley.
Sc evenly along the first side of the star point.
At the tip work:
(sc, ch 2, sc).
Continue sc down the opposite side.
Sl st into the valley.
Repeat around all six points.
Decorative Gold Outline
Using fine gold yarn or embroidery thread, surface crochet a line from each valley toward the tip of the star.
Repeat around all six sections.
Alternatively, embroider a simple chain stitch along the same path.
Green Leaf Layer
Using forest green yarn, make a MR.
R1: Work 6 sc into MR. Join.
R2: *Ch 7, sl st in second ch from hook, sc, hdc, dc, dc, tr. Sl st into next base st.*
Repeat 6 times to create 6 pointed leaves.
FO leaving a long tail for sewing.
Large Poinsettia Petals
Using the contrasting flower color, make a MR.
R1: Work 6 sc into MR. Join.
For each petal:
Ch 8.
Beginning in second ch from hook work:
sl st, sc, hdc, dc, tr, dc, hdc.
Sl st into the next stitch of the center ring.
Repeat around to create 6 petals.
Petal Edging
For stronger definition, work around each petal with the same yarn:
sl st, sc, hdc along the first side.
Work (sc, ch 1, sc) into the petal tip.
Continue evenly down the opposite side.
This creates the raised pointed petals seen in the finished ornament.
Inner Flower Layer
Using the second flower color, make a MR.
R1: 6 sc into MR.
R2: In each stitch work:
(ch 5, sl st in second ch, sc, hdc, dc, sl st into same base st).
Repeat six times.
FO leaving a sewing tail.
Assembling the Poinsettia
- Place the green leaf layer in the center of the star.
- Place the large poinsettia layer over the leaves.
- Rotate it slightly so the green leaves remain visible between the petals.
- Add the smaller flower layer.
- Sew through all layers securely.
Gold Bead Center
Sew 7 small gold beads into the center of the flower.
Place one bead in the middle and arrange the remaining beads around it.
Pass the thread through each bead at least twice so the decoration is secure.
Optional Raised Leaf Details
To give the green leaves more definition, use a yarn needle and matching green yarn.
Embroider one straight line from the base to the tip of each leaf.
Add two or three short diagonal stitches on each side to imitate leaf veins.
Hanging Loop
Cut approximately 20-25 cm of gold cord.
Fold it in half.
Pass both ends through a wooden bead.
Tie the ends securely together.
Attach the loop to the top point of the star.
Crochet Hanging Loop Alternative
If you prefer an entirely crocheted ornament:
Join yarn to the top point.
Ch 28.
Sl st back into the same point.
FO and weave in securely.
Optional Double-Layer Star
For a thicker ornament, crochet two identical star bases.
Place wrong sides together.
Join with sc around the entire edge.
Before closing the final point, insert a very small amount of polyester stuffing.
Finish joining and FO.
Colorway 1 – Classic Red Star
- Base: deep Christmas red
- Outline: antique gold
- Leaves: forest green
- Large flower: natural cream
- Center: gold beads
Colorway 2 – Cream Star
- Base: warm cream
- Outline: antique gold
- Leaves: forest green
- Large flower: deep red
- Center: gold beads
Colorway 3 – Evergreen Star
- Base: forest green
- Outline: antique gold
- Inner details: deep red
- Large flower: natural cream
- Center: gold beads
Blocking
- Lightly dampen the finished star.
- Place it on a blocking mat.
- Pin all six tips outward evenly.
- Pin the valleys between each point inward.
- Arrange the flower petals and leaves.
- Allow the ornament to dry completely before removing the pins.
Finishing
- Weave in every yarn end.
- Check that the flower is centered.
- Shape each poinsettia petal with your fingers.
- Make sure all beads are firmly attached.
- Straighten the decorative gold lines.
- Check the hanging loop before displaying the ornament.
Frequently Asked Questions
Yes. Use thicker yarn and a larger hook, or add an additional round before working the pointed outer edge.
Yes. Replace the gold thread with cream yarn and use small wooden beads or crocheted bobbles in the center.
Mercerized cotton or tightly spun cotton gives excellent stitch definition and helps the star maintain its shape.
Yes. Leave off the long hanging loop and attach a shorter cord. After the gift is opened, the star can be reused as a Christmas ornament.
Yes. Crochet the same star in red, cream and green, changing which color is used for the base and center flower. This creates a coordinated set while keeping every ornament slightly different.
Yes. Their lightweight construction makes them suitable for tree branches, garlands, windows, cabinet handles and holiday gift wrapping.
The finished Christmas Crochet Star Ornament Pattern

