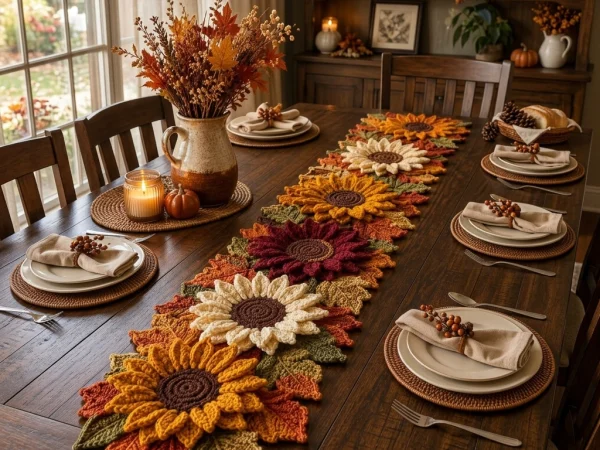
Crochet Autumn Maple Leaf Candle Centerpiece Pattern
Beginner Friendly
Perfect for those just starting their crochet journey, with clear instructions and simple techniques
Single-Day Project
A satisfying project you can complete in a single afternoon or evening.
Handmade Gift
A beautiful keepsake — free forever. Read online or print at home.
About This Crochet Autumn Maple Leaf Candle Centerpiece Pattern
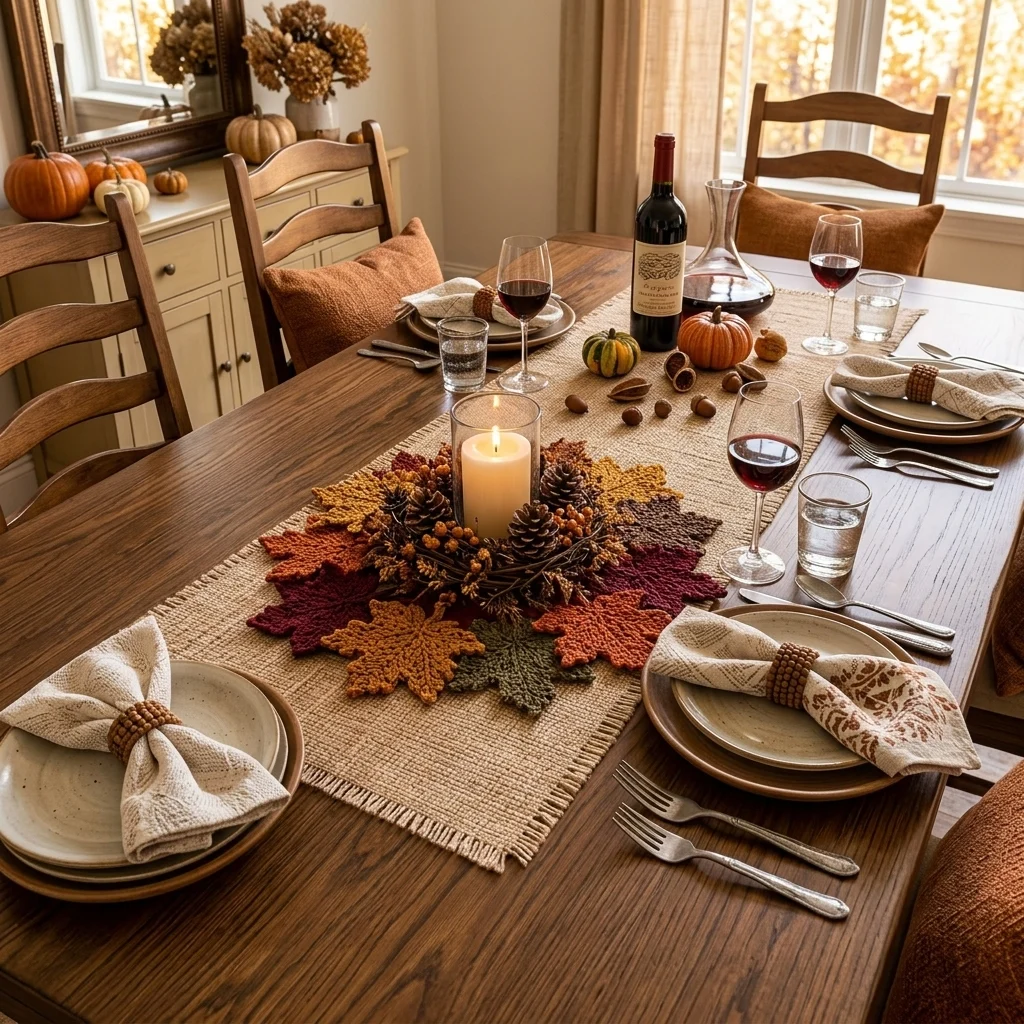
This crochet maple leaf centerpiece pattern creates a dramatic ring of dimensional autumn leaves in burnt orange, burgundy, mustard, olive, rust, and chocolate brown. The pointed maple silhouettes overlap around an open central space, giving you a handmade foundation for a fall table arrangement while keeping the crochet itself separate from the candle or decorative vessel placed in the middle.
The design uses three leaf sizes rather than repeating one identical motif. Large five-lobed maple leaves form the outer silhouette, medium leaves build the second layer, and smaller accent leaves close visible gaps around the inner ring. Raised surface-crochet veins and shaped points give each motif more definition, while careful blocking creates the crisp botanical appearance shown in the reference.
This advanced project takes approximately 12-16 hours, including motif blocking and assembly. It is a good project for crocheters comfortable with tall stitches, branching construction, surface slip stitches, picots, color planning, shaped motifs, blocking, and assembling many separate pieces into one stable decorative mat.
Materials
- DK / light worsted cotton in burnt orange approximately 90 m
- DK / light worsted cotton in deep burgundy approximately 80 m
- DK / light worsted cotton in mustard gold approximately 80 m
- DK / light worsted cotton in muted olive green approximately 70 m
- DK / light worsted cotton in chocolate brown approximately 60 m
- DK / light worsted cotton in dark rust approximately 70 m
- 3.5 mm crochet hook main motifs
- 3.0 mm crochet hook optional for firmer surface veins
- Yarn needle for assembly and weaving ends
- Stitch markers optional for marking lobe attachment points
- Rustproof blocking pins at least 30 recommended
- Blocking mat large enough for individual leaves
- Scissors 1 pair
- Non-slip felt or cotton backing optional, approximately 30 cm diameter
Abbreviations
chchainsl stslip stitchscsingle crochethdchalf double crochetdcdouble crochettrtreble crochetdtrdouble treble crochetststitchstsstitchesspspaceskskipRSright sideWSwrong sidepicotch 3, sl st in first chLarge Five-Lobed Maple Leaves – Make 8
- Foundation: Ch 18. This chain becomes the central vein of the leaf.
- Beginning in second ch from hook, sl st in next 2 ch, sc in next 2 ch, hdc in next 2 ch, dc in next 3 ch, tr in next 4 ch, dtr in next 3 ch, then work 5 dc in final ch.
- Rotate the work and continue along the opposite side of the foundation chain: dtr in next 3 ch, tr in next 4 ch, dc in next 3 ch, hdc in next 2 ch, sc in next 2 ch, sl st in final 2 ch.
- Lower-right lobe: From the lower third of the center foundation, ch 8. Beginning in second ch from hook work sl st, sc, hdc, dc, tr, dc, sc. Sl st back into the center foundation.
- Middle-right lobe: Move approximately 3 sts upward. Ch 12. Beginning in second ch from hook work sl st, sc, hdc, dc, tr, dtr in next 3 ch, tr, dc, sc. Attach with sl st.
- Upper-right lobe: Move approximately 3 sts upward. Ch 15. Work back with sl st, sc, hdc, dc, tr, dtr in next 5 ch, tr in next 2 ch, dc, hdc, sc. Attach securely.
- Repeat the lower, middle, and upper lobe constructions symmetrically along the left side of the center foundation.
- Center lobe: At the top of the central vein, ch 17. Beginning in second ch from hook work sl st, sc, hdc, dc, tr, dtr in next 6 ch, tr in next 3 ch, dc, hdc, sc, sl st. Attach at the top center.
- Outer shaping round: Work sc evenly around the leaf silhouette. Use ch-2 spaces between secondary points to keep the outer edge flexible.
- At every major lobe tip work (sc, picot, sc).
- At each deep valley between lobes work sl st, ch 1, sl st to pull the valley inward.
- Second edging round: Work (sc, ch 2, sc) into each ch-2 sp. At the five dominant tips work (sc, picot, sc).
- Surface sl st from the base to the center tip along the original foundation chain to form the raised main vein.
- Surface sl st outward from the center vein along each major lobe foundation to form the side veins.
- Stem: Join at the lower center, ch 8, then sl st in second ch from hook and each remaining ch. Sl st back into the leaf base.
- Fasten off and block the leaf to approximately 17-19 cm across.
Medium Maple Leaves – Make 8
- Foundation: Ch 15.
- Beginning in second ch from hook work sl st in next 2 ch, sc in next 2 ch, hdc in next 2 ch, dc in next 3 ch, tr in next 3 ch, dc in next ch, then 5 dc in final ch.
- Continue down the opposite side with dc in next ch, tr in next 3 ch, dc in next 3 ch, hdc in next 2 ch, sc in next 2 ch, sl st in final 2 ch.
- Lower-right lobe: Ch 6. Work back with sl st, sc, hdc, dc, hdc. Attach to the center foundation.
- Middle-right lobe: Ch 9. Work back with sl st, sc, hdc, dc, tr in next 2 ch, dc, sc. Attach approximately 2 sts above the lower lobe.
- Upper-right lobe: Ch 11. Work back with sl st, sc, hdc, dc, tr in next 4 ch, dc, hdc, sc. Attach approximately 2 sts above the middle lobe.
- Repeat all three lobes symmetrically on the left side.
- Center lobe: Ch 13. Work back with sl st, sc, hdc, dc, tr in next 5 ch, dc, hdc, sc, sl st.
- Work sc around the complete outer silhouette, inserting ch-2 spaces between major sections.
- Work a picot at every dominant lobe tip and sl st into every deep valley.
- Surface sl st from base to tip to create the center vein.
- Add surface sl sts along the major side lobes.
- Ch 7 for the stem, sl st back along the chain, and fasten off.
- Block to approximately 13-15 cm across.
Small Maple Accent Leaves – Make 6
- Foundation: Ch 11.
- Beginning in second ch from hook work sl st, sc, hdc, dc, tr in next 3 ch, dc, hdc, sc.
- Work 5 sc in the final chain and continue along the opposite side with sc, hdc, dc, tr in next 3 ch, dc, hdc, sc, sl st.
- First side lobe: Ch 5, then work sl st, sc, hdc, dc back along the chain. Attach to the center.
- Second side lobe: Ch 7, then work sl st, sc, hdc, dc, tr, sc back along the chain. Attach above the first lobe.
- Repeat both lobes on the opposite side.
- Center lobe: Ch 9, then work sl st, sc, hdc, dc, tr, dc, hdc, sc back along the chain.
- Work sc around the outer edge, adding a picot at each of the five principal points.
- Surface sl st through the center foundation to form the vein.
- Ch 5 for the stem, sl st back along the chain, and fasten off.
- Block to approximately 9-11 cm across.
Raised Leaf Veins
- Choose a matching or slightly darker shade than the leaf body.
- Insert the hook from the RS at the leaf base and bring up a loop.
- Surface sl st along the central foundation toward the center tip, keeping the stitches relaxed enough that the leaf remains flat.
- Fasten off at the tip and return to the center vein for each side branch.
- Surface sl st outward along each major lobe foundation.
- Stop approximately 1 cm before each lobe tip so the vein tapers naturally.
- Weave all vein ends into the WS of the motif.
Color Distribution
- Make 2 large leaves in burnt orange.
- Make 2 large leaves in deep burgundy.
- Make 1 large leaf in mustard gold.
- Make 1 large leaf in olive green.
- Make 1 large leaf in chocolate brown.
- Make 1 large leaf in dark rust.
- For the 8 medium leaves, make 2 mustard, 2 burnt orange, 1 burgundy, 1 olive, 1 brown, and 1 rust.
- For the 6 small accent leaves, make 2 mustard, 1 burgundy, 1 olive, 1 orange, and 1 chocolate brown.
- Avoid placing all identical colors together during assembly. The strongest effect comes from alternating warm and dark shades around the circle.
Blocking the Maple Leaves
- Dampen one finished leaf evenly and place it RS upward on a blocking mat.
- Pin the stem base and center vein first.
- Stretch the center lobe gently upward and pin its tip.
- Pin the upper side lobes at matching angles.
- Pin the middle and lower lobes, maintaining deep inward valleys between them.
- Pin each picot or secondary point individually where needed.
- Straighten the surface-crocheted veins before the motif dries.
- Allow the leaf to dry completely before removing the pins.
- Repeat for every leaf before beginning centerpiece assembly.
Inner Support Ring
- With chocolate brown, ch 72 and join with sl st to form a ring, taking care not to twist the chain.
- Round 1: Ch 1, sc in each ch around. Join. (72 sts)
- Round 2: Ch 1, sc in each st around. Join. (72 sts)
- Round 3: Ch 1, hdc in each st around. Join. (72 sts)
- Round 4: Ch 1, sc in each st around. Join. (72 sts)
- Fasten off. The ring should lie flat and create an open center approximately 17-19 cm across after light blocking.
First Layer – Large Leaves
- Place the blocked support ring flat with the RS facing upward.
- Position the 8 large leaves evenly around the ring with their stems pointing toward the center and their major tips pointing outward.
- Overlap neighboring leaves by approximately 2-3 cm.
- Rotate alternating leaves slightly clockwise and counterclockwise so the outer silhouette looks natural rather than perfectly radial.
- Pin all 8 leaves before sewing anything permanently.
- Sew each leaf stem and lower center vein securely to the support ring.
- Add one hidden stitch at the lower edge of each middle side lobe where it overlaps the neighboring leaf.
- Leave all major outer tips free so the finished centerpiece retains depth.
Second Layer – Medium Leaves
- Position one medium leaf over each gap between neighboring large leaves.
- Allow approximately one-third of each medium leaf to overlap the large motifs beneath it.
- Angle several medium leaves slightly toward the left or right rather than pointing every tip directly outward.
- Distribute mustard and orange leaves between darker burgundy, olive, and brown sections.
- Sew each medium leaf through its stem and lower center vein to the support ring or to dense portions of the large leaves beneath it.
- Add one small hidden side stitch if the leaf rotates too freely.
Third Layer – Small Accent Leaves
- Place the 6 small leaves around the inner circumference wherever the support ring remains visible.
- Angle their tips diagonally into gaps between larger motifs.
- Keep the center opening clear and approximately circular.
- Sew each small leaf at the stem and one point along the lower vein.
- Leave the outer half of each small leaf free to create dimensional layering.
Optional Non-Slip Backing
- Place the assembled crochet centerpiece on felt or tightly woven cotton fabric.
- Trace a circle approximately 1 cm smaller than the innermost sewn portions of the leaf arrangement.
- Cut out the backing.
- Position it against the WS so it remains hidden beneath the crochet leaves.
- Hand sew around the backing edge using matching thread, catching only dense crochet sections.
- Do not extend the backing into the open center intended for a separate centerpiece vessel.
Finishing
Weave all assembly tails into the backs of the leaves and inspect the centerpiece from both sides. Reinforce any motif that shifts excessively when the mat is lifted, but avoid sewing down every lobe. The raised outer tips and overlapping leaves create the full autumn wreath effect seen in the reference design.
Give the assembled mat a final light blocking if necessary, concentrating on the outer silhouette rather than flattening every layer. Keep the center opening unobstructed. The crochet piece is intended as a decorative mat around a separate centerpiece vessel; it should never touch a candle flame, hot glass, or other heat source. For a lower-maintenance display, an LED candle can provide a similar visual effect without an open flame.
Tips for Success
- Use a firmly twisted cotton yarn so the maple points stay crisp after blocking. Very soft yarn can blur the deep valleys that define the leaf silhouette.
- Block every motif before planning the circle. A finished maple leaf can gain several centimeters of width once the lobes are properly opened.
- Arrange all 22 leaves before sewing the first one. This makes it much easier to balance mustard, burgundy, orange, olive, and brown around the centerpiece.
- Sew through center veins and dense lower sections instead of delicate outer points. This keeps the leaves secure while allowing the tips to remain dimensional.
- Keep checking the center opening during assembly. The layered leaves should frame it without gradually creeping inward.
Common Mistakes to Avoid
- Do not skip blocking. If your maple leaves look rounded rather than pointed, dampen them and pin every major lobe and valley separately before assembly.
- Avoid arranging all stems and center veins in perfectly straight radial lines. Slight rotations make the finished leaf ring look more natural and layered.
- Do not place identical colors side by side unless another contrasting leaf partially separates them. Distributing the palette evenly creates the rich patchwork appearance of the reference.
- Avoid sewing the outer leaf tips to neighboring motifs. This flattens the centerpiece and removes much of its visual depth.
- Do not allow yarn or other combustible decorations to sit against a real candle vessel. Maintain generous clearance and use a stable heat-resistant candle holder, or choose an LED candle.
Ways to Customize This Pattern
- Create a Thanksgiving palette using pumpkin orange, wheat gold, cranberry, chocolate, and warm cream instead of olive green.
- Make a larger centerpiece by adding a fourth outer layer of 8-10 medium maple leaves and increasing the finished diameter to approximately 65 cm.
- Create a neutral farmhouse version with oatmeal, camel, mocha, cream, muted terracotta, and sage cotton.
- Add a thin metallic copper strand only to the surface-crocheted veins of selected leaves for subtle evening shimmer.
- Use the same leaf motifs individually as coasters, place-card decorations, napkin accents, or a matching autumn garland.
Frequently asked questions
Use firm cotton yarn and block the leaves while damp. Pin the center tip, side lobes, valleys, and smaller edge points separately. Do not remove the pins until the motif is completely dry. The surface-crocheted veins also help stabilize the finished shape.
For the dimensions in this pattern, aim for an open center approximately 17-19 cm across. You can enlarge it by using a longer support-ring foundation chain, but keep the leaves completely separate from any flame or heat source placed in the center.
Yes. The center can hold a vase, ceramic pumpkin, bowl, battery-operated candle, or another freestanding seasonal decoration. The crochet leaf ring works independently as a table mat, so the central display can be changed throughout autumn.
You may have sewn too many outer points down. Secure each motif mainly through its stem, lower center vein, and one discreet overlap. Leave most lobe tips free and gently lift them after assembly to restore the layered appearance.
You can, but using three sizes creates a fuller and more natural circular arrangement. The medium and small leaves fill gaps that would otherwise expose the support ring, while the large leaves create the strong pointed outer silhouette.
The finished Crochet Autumn Maple Leaf Candle Centerpiece Pattern