Beautiful Autumn Crochet Maple Leaves – Step-by-Step Fall Decoration Pattern
Bring the cozy colors of autumn into your home with these beautiful handmade crochet maple leaves!
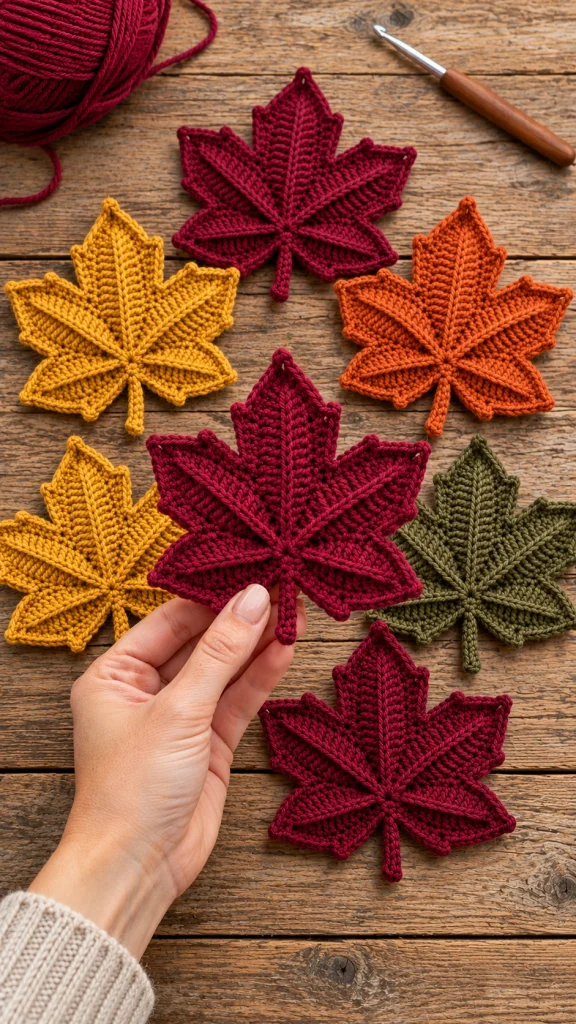
Featuring rich burgundy, golden mustard, burnt orange, and earthy olive green, these textured crochet leaves are a wonderful way to celebrate the fall season.
Each leaf features pointed lobes, delicate raised veins, and a small crocheted stem, creating a lovely botanical appearance.
Whether you use them for autumn wreaths, handmade garlands, table decorations, or seasonal gifts, these crochet maple leaves add warmth and charm to almost any project.
In this tutorial, you’ll learn how to make an original five-lobed maple-inspired leaf with a raised central vein and decorative stem.
Pattern note: This is an original maple-inspired design based on the reference photo. The photographed leaves have more intricate shaping and branching veins, so the finished motif will be a simpler handmade interpretation rather than an exact reproduction.
Project Overview
- Project: Autumn Crochet Maple Leaves
- Skill Level: Intermediate
- Style: Textured Botanical Crochet
- Technique: Individual Crochet Lobes Joined Together
- Suggested Yarn: DK Cotton Yarn
- Hook Size: 3.5 mm
- Approximate Size: 10–15 cm, depending on yarn and tension
- Terminology: US Crochet Terms
- Best For: Fall Garlands, Wreaths, Table Decor, Appliqués
Materials You’ll Need
- DK cotton yarn in burgundy red
- Mustard yellow yarn
- Burnt orange yarn
- Olive green yarn
- 3.5 mm crochet hook
- Yarn needle
- Scissors
- Stitch markers
- Blocking pins
- Optional fabric stiffener
Crochet Abbreviations
- ch: Chain
- sc: Single Crochet
- hdc: Half Double Crochet
- dc: Double Crochet
- tr: Treble Crochet
- sl st: Slip Stitch
- st: Stitch
- FO: Fasten Off
Step 1 – Crochet the Center of the Maple Leaf
Begin with your chosen autumn yarn color.
Make a magic ring.
Round 1: Ch 1, work 10 sc into the magic ring.
Pull the ring closed and join with a slip stitch to the first sc.
This small circular center will serve as the connection point for the five leaf lobes.
Step 2 – Make the Large Center Lobe
The central lobe should be the tallest and most prominent section of the leaf.
Attach your yarn to the center ring.
Row 1: Ch 11.
Starting in the second chain from the hook, work:
1 sc, 1 hdc, 2 dc, 2 tr, 2 dc, 1 hdc, 1 sc.
Work back along the opposite side of the foundation chain using a similar stitch sequence.
At the tip, add a small chain picot to create a pointed maple-leaf shape.
Join the base of the lobe to the center ring with a slip stitch.
The first elongated leaf lobe is complete.
Step 3 – Crochet the Upper Side Lobes
Maple leaves have distinctive side lobes that extend diagonally outward.
Attach yarn to the next available stitch of the center ring.
First side lobe:
Ch 9.
Starting in the second chain from the hook, work:
1 sc, 1 hdc, 2 dc, 1 tr, 1 dc, 1 hdc, 1 sc.
Work along the opposite side of the chain to create a symmetrical lobe.
Finish with a pointed picot.
Join to the center.
Repeat on the opposite side.
You should now have three prominent leaf lobes.
Step 4 – Create the Two Lower Lobes
The lower lobes are slightly shorter than the upper lobes.
Attach yarn to the next available attachment point.
Ch 7.
Starting in the second chain from the hook, work:
1 sc, 1 hdc, 2 dc, 1 hdc, 1 sc.
Work around the opposite side of the chain.
Finish with a small picot at the tip.
Join the base to the center.
Repeat for the opposite lower lobe.
Your leaf now has five lobes.
Step 5 – Shape the Outer Leaf Edges
For a more realistic maple-leaf appearance, work a decorative edging around each lobe.
Attach yarn at the base of the leaf.
Work single crochet stitches evenly around the outside edges.
At the pointed tip of each lobe, work:
1 sc, ch 2, sl st into the first chain, 1 sc.
This creates a small pointed detail.
Continue around the entire leaf.
Use additional small picots along the edges if you prefer a more jagged, natural maple-leaf silhouette.
Keep your stitches relaxed so the leaf does not curl excessively.
Step 6 – Add the Raised Crochet Veins
The raised veins give the crochet maple leaves their beautiful textured appearance.
Using the same yarn color, insert your hook near the center of the leaf.
Work surface slip stitches along the center of the largest lobe, following the foundation chain.
Continue until you reach the tip.
FO and weave in the ends.
Repeat the process for the four remaining lobes.
For a more pronounced vein, work surface slip stitches loosely enough to remain slightly raised above the leaf.
These decorative veins create a lovely botanical texture.
Step 7 – Crochet the Leaf Stem
Attach yarn to the bottom center of the leaf.
Ch 8.
Starting in the second chain from the hook, work 1 sl st into each chain.
Join the stem to the base of the leaf.
FO and weave in the ends.
For a thicker stem, use single crochet stitches instead of slip stitches.
Step 8 – Block and Shape Your Maple Leaf
Blocking helps create a beautiful, defined maple-leaf shape.
Lightly dampen the finished leaf.
Place it on a blocking mat.
Use pins to spread the five lobes outward.
Make sure the center lobe is the tallest.
Position the upper side lobes diagonally.
Shape the lower lobes to create a balanced silhouette.
Allow the leaf to dry completely.
If you plan to use the leaves as hanging decorations, you may apply a small amount of fabric stiffener suitable for your yarn.
Step 9 – Make Leaves in Beautiful Autumn Colors
One of the most enjoyable parts of this project is choosing your fall color palette.
Deep Burgundy
A rich wine-red shade that creates an elegant autumn look.
Golden Mustard
A warm golden yellow inspired by maple leaves in early fall.
Burnt Orange
A classic pumpkin-orange shade that captures the warmth of autumn.
Olive Green
A natural earthy green that complements the brighter seasonal colors.
Rust Brown
A beautiful warm brown for rustic farmhouse decorations.
Terracotta
A muted orange-red shade that pairs beautifully with cream and beige home decor.
Step 10 – Create an Autumn Crochet Leaf Garland
Once you’ve made several crochet maple leaves, turn them into a beautiful handmade garland.
Make approximately 8–12 leaves in coordinating autumn colors.
Arrange them in your preferred color sequence.
Crochet a long chain using neutral brown or cream yarn.
Attach the leaves to the chain using a yarn needle.
Space them evenly along the garland.
Hang the finished garland across a fireplace mantel, window, shelf, or doorway.
For a fuller look, alternate large and small leaves.
Creative Ways to Use Crochet Maple Leaves
1. Autumn Door Wreath
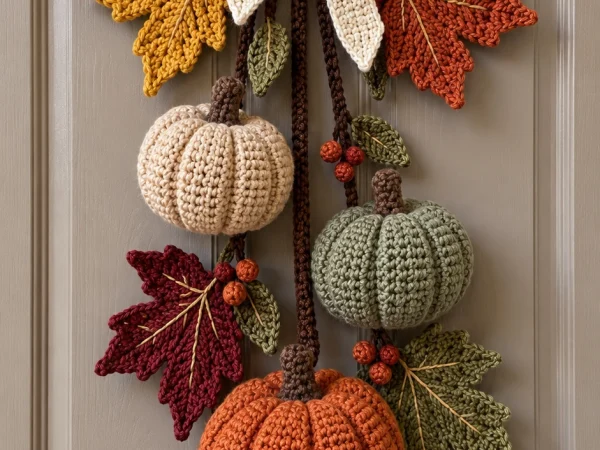
Attach the leaves to a grapevine wreath and add small crochet pumpkins, acorns, and a cream-colored bow.
2. Thanksgiving Table Decorations
Scatter handmade crochet leaves across a table runner for a cozy seasonal centerpiece.
3. Handmade Fall Garland
String the leaves together using rustic cotton yarn or natural twine.
4. Crochet Curtain Tiebacks
Decorate simple crochet curtain ties with autumn leaves for a beautiful seasonal accent.
5. Gift Wrapping Decorations
Attach a small maple leaf to wrapped gifts instead of using traditional ribbon bows.
6. Crochet Bag Appliqués
Sew the leaves onto handmade tote bags or crochet handbags.
7. Fall Wall Hanging
Combine crochet maple leaves with a wooden branch and hanging cotton cords.
8. Autumn Coasters
Use thicker cotton yarn to create larger leaves that can serve as decorative coasters, provided they are made flat and stable.
Tips for Beautiful Crochet Maple Leaves
- Use cotton yarn for crisp stitch definition.
- Choose a slightly smaller hook for firm, structured leaves.
- Keep your tension consistent.
- Block the leaves to emphasize their pointed lobes.
- Use surface crochet for raised decorative veins.
- Experiment with different autumn colors.
- Make leaves in multiple sizes for more natural arrangements.
- Weave in yarn ends securely.
- Test one complete leaf before making a large batch.
Frequently Asked Questions
Are crochet maple leaves beginner-friendly?
This particular design is best suited for intermediate crocheters because it involves shaping pointed lobes and working surface crochet veins.
How long does one crochet leaf take?
Depending on your experience and the amount of detail added, one leaf may take approximately 30–90 minutes.
What is the best yarn for crochet leaves?
Cotton yarn is a great choice because it provides excellent stitch definition and holds its shape well.
Can I make larger maple leaves?
Yes. Use thicker yarn and a larger crochet hook, or modify the lobe lengths to create larger leaves.
Can I use these leaves for Christmas decorations?
Absolutely. Deep red, green, cream, and gold maple leaves can also work beautifully in rustic winter arrangements.
How can I make the leaves stiffer?
Use a suitable fabric stiffener and block the leaves into their desired shape.
Can I wash crochet maple leaves?
Follow the care instructions for your chosen yarn. Cotton leaves can often be gently hand-washed and dried flat.
Can I sell finished crochet leaves?
Yes, you can generally sell handmade leaves created using this original pattern, subject to any applicable local requirements.
Can I make a crochet maple leaf bouquet?
Yes! Attach the finished leaves to suitable floral stems and arrange them in a decorative vase.
What colors look best together?
Burgundy, mustard yellow, burnt orange, and olive green create a classic autumn color palette.
Final Thoughts
These autumn crochet maple leaves are a beautiful way to celebrate the changing seasons through handmade creativity.
With their rich fall colors, pointed shapes, and textured raised veins, they make lovely decorations for wreaths, garlands, gifts, and cozy home accents.
Whether you make just a few leaves or create an entire collection, this crochet project is a wonderful way to bring the warmth of autumn into your home.
Gather your favorite yarn colors, pick up your crochet hook, and enjoy creating your own beautiful collection of handmade maple leaves.
Happy crocheting! 🍁🧶