Vintage Floral Crochet Tote Bag: Free Crochet Pattern
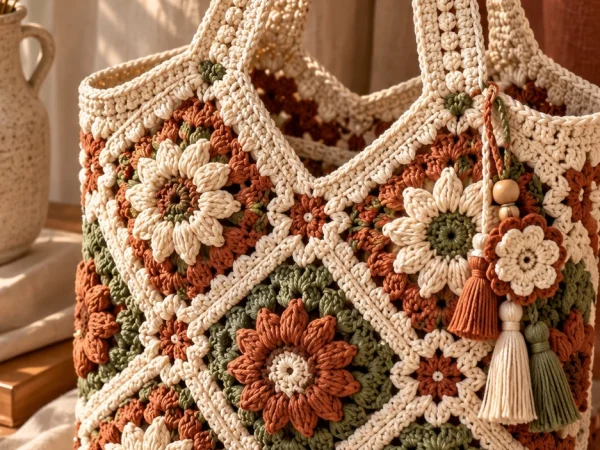
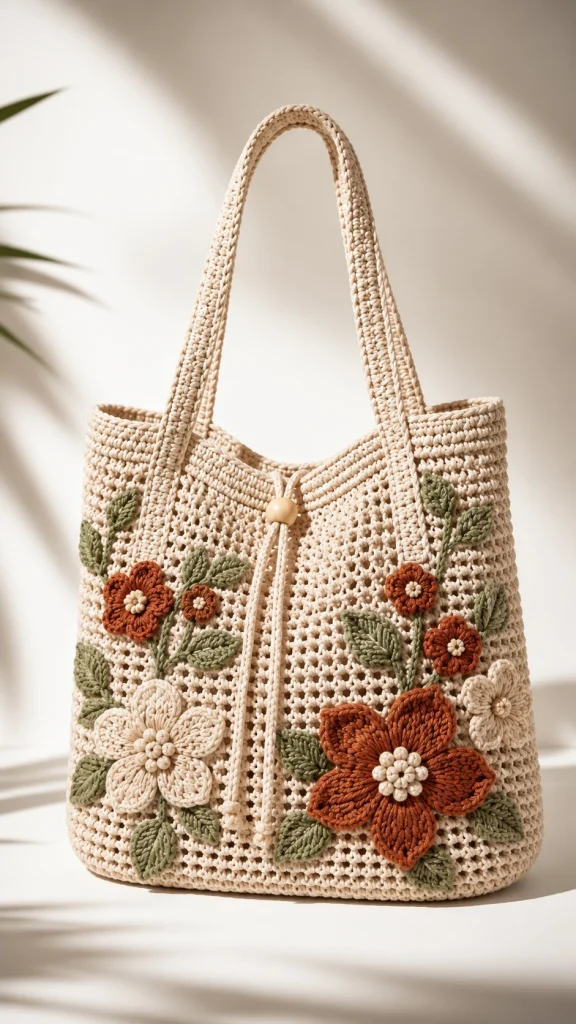
This vintage floral crochet tote bag combines timeless botanical charm with the beauty of handmade accessories. Featuring a warm cream body, delicate openwork stitches, dimensional rust-colored flowers, sage-green leaves, and a simple wooden bead closure, this bag brings a romantic cottage-inspired touch to everyday outfits.
The design is inspired by vintage crochet market bags and embroidered botanical textiles. Its structured base helps it stand upright, while the textured floral appliques create a beautiful three-dimensional finish. Long crochet handles make it comfortable to carry, and the decorative drawstring adds a practical finishing detail.
In this tutorial, you will learn how to crochet the base, create the openwork body, shape the upper band, make sturdy handles, crochet the flowers and leaves, and assemble everything into a coordinated tote. The flower and leaf quantities can be adjusted to suit your preferred arrangement.
Pattern at a Glance
Finished measurements exclude the handles. The reference-inspired proportions are approximate; your final size will depend on yarn, hook, gauge, and tension.
Materials and Supplies
- Worsted-weight or aran cotton yarn in warm cream for the bag body.
- Rust or terracotta cotton yarn for the flowers.
- Sage or muted olive-green cotton yarn for the leaves.
- A small amount of pale cream or golden-beige yarn for flower centers.
- A 4 mm crochet hook for the main bag, or the hook needed to achieve a firm fabric.
- A 3.5–4 mm hook for floral appliques, depending on your tension.
- One smooth wooden bead with a hole large enough for the drawstring.
- Yarn needle, stitch markers, scissors, measuring tape, and optional blocking pins.
Yarn estimate: Plan for approximately 450–650 g of yarn in total, depending on the yarn thickness, finished size, and number of appliques. The cream yarn will account for most of the total. Purchase extra if you want a larger tote or more floral decoration.
Gauge and Preparation
For a sturdy everyday tote, aim for approximately 16 single crochet stitches and 18 rounds per 10 cm using the main hook. This is a target rather than a guaranteed measurement.
Make a small swatch and measure it after allowing it to rest flat. If your stitches are loose, try a smaller hook. If the fabric feels stiff or measures too small, try a larger hook. The bag should feel firm enough to support its contents without becoming rigid.
Abbreviations
Unless otherwise stated, work in US crochet terminology. The turning chain does not count as a stitch. Join each joined round with a slip stitch unless the instructions specify otherwise.
Part 1: Crochet the Bag Base
Use cream yarn and the main hook. The base is worked as an oval around a starting chain to create a flat foundation for the tote.
Foundation chain
Ch 31.
Round 1: Sc in the second chain from the hook and in each of the next 28 chains, sc 3 times in the final chain. Working along the opposite side of the foundation chain, sc in each of the next 29 chain loops. Work 2 sc in the remaining loop at the beginning of the chain. Join with a sl st to the first sc.
Total: 63 sc.
Round 2: Ch 1. Sc in each stitch around, working 2 sc in each of the 3 stitches at one rounded end and 2 sc in each of the 2 stitches at the opposite end. Join.
Total: 68 sc.
Round 3: Ch 1. Sc around, placing 2 sc in every fourth stitch across the rounded end sections and working the straight sides evenly. Join.
Important: The exact placement of increases determines how flat the oval lies. If the base begins to cup, distribute the increases more evenly; if it ripples, reduce or reposition them.
Rounds 4–5: Continue in sc, increasing only around the curved ends as needed to keep the base flat. Place stitch markers at the center of each end to help maintain symmetry.
Base shaping note: Oval bases can have slightly different stitch counts depending on the starting-chain treatment and increase placement. For a fully measured, symmetrical base, count your stitches after every round and adjust the increase spacing to maintain a flat oval. Do not force the base to remain flat by stretching it.
Part 2: Build the Openwork Bag Body
The body uses a simple mesh-inspired stitch pattern that gives the tote the airy appearance seen in the reference. Keep the stitches even, and work the first body round firmly so the base-to-body transition stays neat.
Establish the side wall
Setup round: Ch 1 and sc in the back loop only of every stitch around. Join. This creates a subtle ridge that separates the base from the sides.
Mesh round
Ch 3, which counts as the first dc. Sk the next stitch, dc in the following stitch, ch 1, sk 1 stitch, and repeat the mesh rhythm around. If the stitch count does not divide evenly into the mesh repeat, adjust the spacing at the side markers rather than adding extra increases.
Continue the body
Work the mesh pattern evenly for approximately 14–17 cm, or until the bag reaches the desired depth before the upper band. Keep the side markers aligned and check the bag against a flat surface every few rounds.
Optional reinforcement
If you want a more supportive tote, crochet a fabric lining and sew it inside after assembly. A lining helps prevent small items from slipping through the openwork stitches.
- Keep the chain spaces consistent.
- Avoid pulling the chain stitches too tightly.
- Use stitch markers at both sides of the bag.
- Try the bag on a flat surface before beginning the upper band.
Part 3: Crochet the Solid Upper Band
The solid upper band gives the bag a clean edge and a sturdy area for attaching the handles and drawstring.
Band Round 1: Ch 1 and sc in every stitch or mesh attachment point around, working into the spaces evenly to close the openwork. Join.
Band Rounds 2–5: Ch 1, sc in every stitch around, and join after each round. Keep the top edge level.
Finishing Round: Work one round of reverse single crochet (crab stitch) for a corded edge, or finish with a regular sc round for a simpler appearance. FO and weave in the end.
Because the mesh repeat and the upper band use different stitch structures, the precise transition count depends on the mesh round used. Distribute any necessary stitches evenly so the band does not flare or pull inward.
Part 4: Make the Crochet Handles
Make two matching straps in cream yarn. The straps should be sturdy, comfortable to hold, and wide enough to complement the textured bag.
Handle instructions
- Ch 9.
- Row 1: Sc in the second ch from the hook and across. 8 sc.
- Rows 2 onward: Ch 1, turn, and sc in all 8 stitches.
- Continue until the strap measures approximately 50–55 cm, adjusting the length for your preferred shoulder drop.
- FO, leaving a long tail for sewing.
- Make a second identical strap.
For extra strength, fold each strap lengthwise and sew the long edges together, or crochet a second strip and join both layers. This helps reduce stretching when the tote is used regularly.
Attach the handles
Position the handles symmetrically on the front and back of the bag. A practical starting point is to place each handle end about 7–8 cm from the nearest side seam. Pin them in place and check the spacing before sewing.
Use the long yarn tails to sew each handle end securely to the inside of the upper band. Stitch around the full attachment area and reinforce it with several passes. Do not rely on a single stitch or knot to support the weight of the bag.
Part 5: Crochet the Rust-Colored Flowers
The floral appliques are the focal point of this design. Make a combination of larger statement flowers and smaller blossoms in rust or terracotta yarn, then finish the centers in pale cream.
Small five-petal flower
With rust yarn, make a magic ring.
Round 1: Ch 1, work 10 sc into the ring, and join with a sl st. Pull the ring closed. 10 sc.
Round 2: Repeat around: sl st in the next stitch, ch 3, work 2 dc in the same stitch, ch 3, sl st in the same stitch. This forms one compact petal. Repeat to create five petals, distributing them evenly around the center.
FO and weave in the ends.
Large dimensional flower
Make a second flower using a larger hook or slightly thicker yarn. Work 5–6 petal groups around a small center ring, using additional dc stitches in each petal to make fuller petals. Keep the base of each petal compact so the flower can be sewn flat against the bag.
Flower center
With pale cream yarn, make a small center using a magic ring and 6 sc. Join and FO. Sew the center firmly onto the middle of each flower.
For the most balanced arrangement, make approximately 5–7 flowers in different sizes. Use the larger flowers near the lower front corners and smaller flowers to fill the gaps. The exact number is decorative and can be adjusted to your taste.
Part 6: Crochet the Sage-Green Leaves
Muted sage leaves create a natural contrast against the cream fabric and rust flowers. Slightly pointed leaf shapes look especially lovely when arranged along the stems.
Simple pointed leaf
- With sage yarn, ch 9.
- Starting in the second chain from the hook, work 1 sl st, 1 sc, 1 hdc, 3 dc, 1 hdc, and 3 sc in the final chain.
- Working on the opposite side of the chain, work 1 hdc, 3 dc, 1 hdc, 1 sc, and 1 sl st to reach the starting point.
- FO, leaving a long tail for sewing.
Shape the leaf gently with your fingers. Add a small line of embroidery down the center using a contrasting strand of sage yarn if you want a more defined vein.
Make approximately 8–12 leaves, varying their size by using shorter or longer starting chains. Sew the leaves around the flowers, angling them outward to create a botanical arrangement rather than a straight row.
Part 7: Add the Drawstring and Wooden Bead
The reference-inspired bag includes a simple cord closure with a wooden bead. This detail adds warmth and gives the top edge a handmade finish.
- Make a long crochet cord by chaining approximately 75–90 cm, then slip-stitching back along the chain for extra strength.
- Thread the cord through the upper band, passing it through evenly spaced gaps or a separate row of eyelets.
- Bring both ends toward the front of the bag.
- Thread the ends through the wooden bead and secure them with neat knots hidden behind the bead where possible.
- Test the closure gently to make sure the cord slides without catching on the fabric.
Keep the drawstring decorative and avoid pulling it so tightly that the upper band wrinkles. If you prefer a more structured tote, you can omit the cord and use a magnetic snap sewn to a lining instead.
Part 8: Assemble and Arrange the Floral Design
Lay the bag flat with the front facing upward. Arrange the flowers and leaves before sewing anything permanently. The most attractive layout usually has an asymmetrical botanical flow, with larger blossoms at the bottom and smaller flowers rising toward the sides.
Suggested arrangement
- Place one large rust flower near the lower right front.
- Place another large flower toward the lower left, leaving some cream fabric visible between them.
- Add smaller rust blossoms around the middle of the bag.
- Position sage leaves between flowers, with their tips pointing in different directions.
- Check that the floral design does not obstruct the drawstring or handle attachments.
- Pin every piece in place and photograph the layout before sewing.
- Sew around the entire base of each applique using matching yarn.
- Weave in every loose end on the inside of the bag.
Do not sew only through the outer loops of the mesh. Secure the appliques through several sturdy stitches so they remain attached when the bag flexes.
Finishing and Blocking
- Weave in all yarn ends securely.
- Check the handles for equal length and symmetrical placement.
- Lightly shape the bag by hand, especially the base and upper band.
- Block the floral appliques separately if needed before attaching them.
- Allow the bag to dry completely if you damp-block the fabric.
- Add a fabric lining if the tote will carry small or heavy objects.
Customization Ideas
1. Choose a different seasonal palette
Replace rust with burgundy for an autumn look, dusty rose for a romantic version, or mustard yellow for a warmer vintage style.
2. Add a full floral panel
Increase the number of small flowers and leaves to create a denser botanical arrangement across the front.
3. Make a smaller everyday bag
Shorten the foundation chain and reduce the number of body rounds. Keep the handle width and attachment reinforcement proportional to the smaller bag.
4. Add a matching lining
Choose a neutral cotton lining and sew it inside the bag to improve structure and keep personal items secure.
Care Instructions
- Follow the care label for the yarn you choose.
- Hand-wash gently in cool water when the yarn permits.
- Avoid twisting or wringing the bag, as this can stretch the mesh and handles.
- Press excess water out with a clean towel.
- Reshape the bag and dry it flat away from direct heat.
- Store it empty or lightly stuffed to help preserve its shape.
Frequently Asked Questions
Is this vintage floral crochet tote bag suitable for beginners?
The basic stitches are accessible to confident beginners, but the mesh construction, oval base, floral appliques, and reinforced handles are easier for someone with intermediate crochet experience.
Can I use acrylic yarn instead of cotton?
Yes, although cotton or a cotton blend generally gives a firmer finish and better stitch definition. Acrylic may stretch more under weight, so a lining and reinforced handles are especially useful.
How do I stop the bag from stretching?
Use a firm gauge, reinforce the handles with multiple rows of stitching, and add a lining if you plan to carry heavier items. Avoid carrying more weight than the handles and fabric can safely support.
Can I sew the flowers on after finishing the bag?
Yes. In fact, attaching the flowers after completing the bag makes it easier to arrange the botanical design and keep the appliques evenly spaced.
How much yarn will I need?
Approximately 450–650 g in total is a reasonable starting estimate for this style, but the exact amount depends on your yarn weight, hook size, tension, and the number of flowers and leaves.
Final Thoughts
This vintage floral crochet tote bag is a beautiful project for anyone who loves natural colors, dimensional crochet details, and timeless handmade accessories. The combination of cream openwork, rust blossoms, sage leaves, and a wooden bead creates a warm botanical look that works throughout the year.
Make the design your own by changing the flower arrangement, adjusting the strap length, or choosing a new palette. With careful finishing and reinforced handles, the result is a charming handmade tote for everyday outings, markets, and thoughtful gifts.
Enjoyed this pattern? Save it to your crochet inspiration board and share your finished floral tote with your fellow makers.